
Zoom is a widely used video conferencing platform that offers various features to support online collaboration. One of these features is the ability to record meetings. Recording Zoom meetings provides several benefits, such as:
- Keeping an accurate record of what was discussed
- Increasing accountability among participants
- Helping with training by allowing people to review the content later
- Enabling those who missed the meeting to catch up on what happened
The meeting recording feature is a useful tool for enhancing digital communication on Zoom.
How to Record a Zoom Meeting as a Participant
To record a Zoom meeting as a participant, you must first have the host's permission. If you have the necessary permissions, the steps are the same as recording as a host. If you don't see the recording option, the host has likely restricted recording permissions.
Fortunantely there is a quick and easy way to record any Zoom meeting.
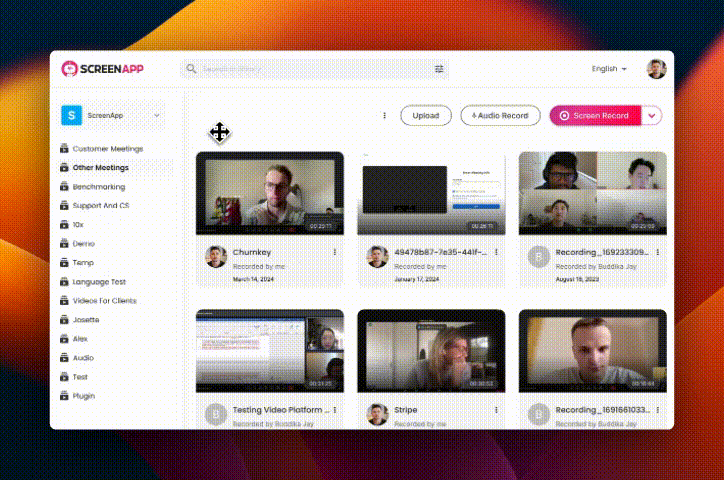
1. Signup for a free Zoom Recorder (ScreenApp)
2. Start your Zoom Meeting and Click "Screen Record" on ScreenApp and select the Zoom Meeting
3. Click stop and enjoy your recording
How to Record a Zoom Meeting as a Host
Recording a Zoom meeting as a host is a simple process, but it varies slightly across different platforms. Here's a step-by-step guide for each platform:
On PC and Laptop:
- Start the Zoom meeting as a host.
- Once in the meeting, click the 'Record' button located at the bottom of the screen.
- Choose between 'Record on this Computer' to save locally or 'Record to the Cloud' to save on Zoom's cloud service.
- To stop recording, click 'Pause/Stop Recording'. After ending the meeting, Zoom will convert the recording so you can access the files.
On Mobile (Android/iOS):
- Start or join a Zoom meeting as a host.
- Tap the screen to bring up the meeting controls.
- Tap 'More' (three dots symbol) in the right corner of the screen.
- Select 'Record to the Cloud'. (Mobile recording is only available to the cloud.)
- To stop recording, tap 'More' and then 'Stop Recording'. The recording will be processed and available in your Zoom account's cloud storage.
Understanding Zoom Recording
Zoom's recording feature allows hosts and, with permission, participants, to capture the video, audio, and chat text of a meeting. These recordings can either be stored locally on the user's device or saved to the cloud, depending on the user's preference and Zoom plan. This feature is particularly useful in professional settings where the details of meetings are crucial or if you have made an insightful presentation and would like to share the same with the world else of just the people in the meeting or, in educational contexts where lessons may need to be revisited, and in social situations where preserving memories can add value. Beyond this, Zoom recordings can be utilized for content creation, such as webinars or online tutorials, further broadening their use cases.
Preparing for a Zoom Meeting Recording
Before diving into the process of recording a Zoom meeting, there are several considerations and preparations to undertake. First and foremost, ensure that your device — whether it's a PC, laptop, or mobile device — meets the necessary system requirements and that you have the latest version of Zoom installed.
Next, consider the quality of your video and audio. Good-quality microphones and cameras significantly enhance the recording. Also, ensure that your internet connection is stable enough to avoid disruptions during the meeting.
How to Record Zoom Meeting Audio
Zoom meetings automatically record audio along with video. However, for high-quality audio, keep the following tips in mind:
- Use a high-quality microphone: Built-in microphones may not always provide the best audio quality. Consider using an external microphone for better sound.
- Reduce background noise: Find a quiet environment to hold the meeting or use a noise-canceling tool to minimize background noise.
- Check audio settings in Zoom: Ensure that the correct microphone is selected in the Zoom audio settings. You can also test your audio here before the meeting starts.
- Use audio enhancements in Zoom: Features like 'Suppress Background Noise' and 'Echo Cancellation' in Zoom's advanced audio settings can enhance audio quality.
Legal and Ethical Considerations of Recording Zoom Meetings
Recording a Zoom meeting isn't just about pressing the 'Record' button. It carries with it various legal and ethical considerations. Different regions and countries have different laws regarding recording conversations, which include virtual meetings. Some places allow one-party consent, meaning only the recorder needs to agree, while others require all-party consent.
Aside from the law, it's a matter of respect and professionalism to inform all participants about the recording. Transparency fosters trust and helps maintain positive relationships. Before recording, ensure that:
- You've informed all participants about the recording and its purpose.
- Everyone involved has provided their consent.
- You're familiar with the laws in your region or country regarding recording conversations.
Post-Meeting Actions: Storing and Sharing Recorded Zoom Meetings
After the meeting ends, and the recording has been processed, it's time to manage the recorded file. For local recordings, Zoom will convert the recording into multiple MP4 (video), M4A (audio), and text (chat) files stored in a designated folder on your computer.
To share the recording:
- If it's a local recording, you can share it directly as you would any other file.
- For cloud recordings, log into your Zoom account online, navigate to 'Recordings', select the meeting, and click 'Share'. From here, you can adjust the sharing settings and copy the sharing link.
Common Troubleshooting Tips
Even with perfect preparation, you may encounter some hiccups during the recording process.
Here are some common issues and their solutions:
- Recording stops unexpectedly: Ensure you have sufficient storage space on your device (for local recordings) or in your Zoom cloud storage.
- Poor audio or video quality: Check your device's internet connection and try to minimize the number of running background apps. Using wired internet connections, closing unnecessary applications, and using good-quality audio/video equipment can alleviate quality issues.
- Can't find the recording: For local recordings, check the location under Zoom settings > Recording > Local Recording. For cloud recordings, log in to your Zoom account online and check under the 'Recordings' tab.
Tips for Quality Video Recording
To ensure high-quality Zoom recordings, consider the following tips:
- Lighting: Make sure your space is well-lit. Natural light is best, but if that's not possible, ensure your face is well-illuminated by indoor lighting.
- Camera Position: Position your camera at eye level for the most flattering angle. If you're using a laptop, you might need to elevate it.
- Background: Choose a neat, non-distracting background. You can also use Zoom's virtual background feature.
Navigating Zoom's Recording Settings
Zoom offers several recording settings to customize your experience:
- Local or Cloud Recording: Choose where to save your recording. Local recordings are stored on your computer, while cloud recordings are stored on Zoom's servers.
- Record active speaker, gallery view, and shared screen separately: This option creates separate video files for each view, which can be useful for editing purposes.
- Optimize for 3rd party video editor: This option increases the frame rate from 15 fps to 25 fps, which may result in larger files but smoother videos.
- Audio transcript: This automatically transcribes the audio of a meeting or webinar that you record to the cloud.
Cloud vs. Local Storage for Zoom Recordings
Zoom offers two primary storage options for recordings: Cloud and Local. Both have their unique advantages and potential drawbacks:
Cloud Storage
Advantages:
- Access your recordings from anywhere.
- Share links to recordings easily without the need for file transfers.
- If your device crashes, your recording is safe in the cloud.
Drawbacks:
- Limited storage based on your Zoom plan.
- Requires an internet connection to access and download.
Local Storage
Advantages:
- No limitation on storage beyond the capacity of your hardware.
- Easy access to recordings without needing an internet connection.
Drawbacks:
- Recordings can be lost if your device gets damaged.
- Sharing files might be more challenging, especially for large recordings.
How to Annotate a Zoom Recording
Zoom's annotation feature allows users to draw, write, or highlight on the shared screen during a recording. Here's how you can use it:
- Start or join a meeting and begin recording.
- Share your screen, then click on 'Annotate' in the meeting controls.
- Use the annotation tools (text, draw, spotlight, etc.) to add information to the shared screen.
- Annotations will appear in the recording if they are visible during the meeting.
This feature can be used for highlighting important points during a presentation, brainstorming in a group meeting, or guiding a tutorial.
Transcribing Your Zoom Recording
Zoom offers automatic audio transcription for cloud recordings. To enable this feature, go to Zoom's account settings, find the 'Cloud recording' option, and check 'Audio transcript'. The transcript will be available in your online Zoom account under the 'Recordings' tab once the meeting ends and the recording processes.
If you prefer manual or more accurate transcription, several third-party services offer transcription services, like Rev and Temi.
Enhancing Accessibility: Captions and Transcripts
Adding closed captions and transcripts to your Zoom recordings enhances accessibility for users with hearing impairments. Zoom provides automatic live transcriptions for Pro, Business, and Enterprise accounts. You can also manually add captions during the meeting or upload a caption file after the meeting.
For the generated transcript in cloud recordings, you can edit it for accuracy. These accessibility features not only make your meetings more inclusive but also aid in comprehension for all participants.
Utilizing Zoom's Recording for Training and Education
Zoom's recording feature is an invaluable tool for businesses, educators, and organizations, serving as a valuable resource for training and education. Recorded meetings or lessons can be revisited for reinforcing concepts, serving as a reference, or helping those who missed the session. It also provides an opportunity for self-assessment for trainers and educators, enabling them to improve their teaching methods and presentations. For students or trainees, it's an excellent way to revisit the material at their own pace.
Best Practices for Protecting Recorded Zoom Meetings
Securing your recorded Zoom meetings is crucial to protect sensitive information and maintaining privacy. Here are some recommendations:
- Manage Access: For cloud recordings, only share the recording link with trusted individuals. You can also protect the recording with a password for added security.
- Check Settings: Make sure that your Zoom settings do not allow others to download your recordings unless necessary.
- Local Storage: If the recording is stored locally, ensure your computer has the necessary security measures, like a strong password and up-to-date antivirus software.
- Privacy Laws: Familiarize yourself with privacy laws in your region to understand the legal requirements for storing and sharing recordings.
Maximizing Efficiency: Utilizing Zoom's Recording Scheduler
Zoom's recording scheduler is an excellent feature for automating the recording process. If you're a host, you can set Zoom to automatically record all meetings:
- Sign in to your Zoom web portal.
- Click 'Settings', then 'Recording'.
- Turn on 'Automatic recording'.
- Choose whether to record meetings locally (to your computer) or in the cloud.
With this feature, you don't have to worry about forgetting to hit 'Record' at the start of your meeting. Just ensure that your chosen storage location (local or cloud) has enough space to accommodate the recording.
Conclusion
As we have explored in this comprehensive guide, recording Zoom meetings is an incredibly useful feature that allows users to maintain accurate records of discussions, improve accountability, and share the content of meetings with others who couldn't attend. We've taken you through the process of recording meetings as both a host and a participant, discussed the crucial considerations of ethical and legal aspects, and shared tips on managing and sharing your recordings. Now it's up to you to apply these insights and fully harness the potential of Zoom's recording capabilities.
.webp)

