20 Best Screen Recording Software 2026 (Reviewed)
On this page
Finding the best screen recording software in 2026 can be challenging with over 100 options available. Whether you need to record tutorials, capture gameplay, or create professional presentations, the right tool depends on your specific requirements, budget, and technical expertise.
This comprehensive guide reviews 20 top screen recording software options, comparing their features, pricing, and performance. We’ve tested each tool to help you choose the perfect solution for your needs.
What You’ll Learn:
- Top-rated screen recording software for 2026
- Detailed feature comparisons and pricing
- Best tools for specific use cases (gaming, education, business)
- Free vs. paid options analysis
Related Screen Recording Guides: For specific platform guidance, check out our detailed how to screen record on a Mac tutorial, or explore our best free screen recording apps for iPhone for mobile recording needs. Additionally, our best AI screen recorders review covers the latest AI-powered recording tools.
Top Screen Recorders at a Glance
| Screen Recorder | Best For | Pros | Cons | Price | Rating |
|---|---|---|---|---|---|
| ScreenApp | AI-powered recording & transcription | Browser-based, AI features, unlimited free recording | Limited advanced editing | Free/Paid plans | 9.5/10 |
| OBS Studio | Streaming, advanced users | Free, customizable, powerful features | Steep learning curve, technical knowledge required | Free | 8.5/10 |
| Loom | Quick video messages, tutorials | User-friendly, quick sharing, integrations | Limited editing, subscription for full features | Free/Paid plans | 8.5/10 |
| GG Recorder | Gamers, gameplay footage | Gamer-centric, easy to use, high-quality recordings | Limited functionality beyond gaming | Free/Paid versions | 7.5/10 |
| ScribeHow | Instructional content, step-by-step guides | Automated guide generation, ease of use | Limited screen recording functionality, niche focus | Free/Paid plans | 8/10 |
| MagicHow | Web-based activities, Chrome users | Convenient browser extension, easy to use | Chrome-only, simple editing | Free/Paid plans | 7.5/10 |
| Teams Meeting with Screen Share | Microsoft Teams meetings | Seamless Teams integration, meeting capture | Limited to Teams, no advanced editing | Part of Teams | 7.5/10 |
| Splashtop | Remote access, remote capture | Remote recording, secure transmission | Not a dedicated recorder, less intuitive | Subscription-based | 7/10 |
| ShareX | Advanced users, customization | Feature-rich, free, automation | Windows only, steep learning curve | Free | 8/10 |
| Camtasia | Professional creators, educators | Robust editing, high-quality outputs | Expensive, complex interface | Paid | 8.5/10 |
| ScreenFlow | Mac users, content creators | User-friendly, high-quality output | Mac-only, relatively expensive | Paid | 8/10 |
| ScreenPal | Education, basic recording/editing | Intuitive, affordable, integrates with tools | Limited advanced features | Free/Paid plans | 8/10 |
| Dadan | Educators, trainers, content creators | All-in-one platform, interactive features, cloud-based | Limited editing, early-stage product | $8/month | 8.7/10 |
| Screenpresso | Casual users, small businesses | Free, user-friendly, versatile | Basic editing, limited advanced features | Free/Paid versions | 7.5/10 |
| Vimeo with Chrome Extension | Vimeo users, direct uploading | Seamless Vimeo integration, simple workflow | Limited to Vimeo, basic features | Free/Paid plans | 7/10 |
| VideoProc | Basic recording, editing, format conversion | 4K recording, user-friendly, affordable | Lacks advanced editing, moderate learning curve | Paid | 8/10 |
| Screencastify | Quick web recordings, educators | Browser-based, easy sharing, free plan | Limited editing, internet reliant | Free/Paid plans | 7.5/10 |
| Vmaker | Beginners, casual recording | User-friendly, unlimited recording in free plan | Limited advanced features, browser extension | Free/Paid plans | 7.5/10 |
| Nero Platinum Suite 2025 | Professional-grade recording, Nero users | High-quality, comprehensive suite | Expensive, Windows/MacOS only | Paid | 8/10 |
| Pactto | Innovative recording, creative professionals | Unique features, cloud-based, user-friendly | New on market, adaptation required | Paid | 7.5/10 |
We’ll delve into the key aspects of each tool, including:
- Usability: How easy is it to set up and use the software? Is it suitable for beginners or experienced users?
- Features: What functionalities does the tool offer? Does it support basic recording, advanced editing, or live streaming?
- Performance: How smoothly does the software run? Does it affect system resources or cause lag?
By carefully analyzing these factors, you can confidently navigate the screen recording landscape and identify the tool that best aligns with your specific requirements. So, leave the guesswork behind and embark on your journey to finding the perfect screen recorder for your needs.
How to Choose a Good Screen Recorder
Screen recording has become a valuable tool for gamers, educators, business professionals, and anyone who wants to share their skills or expertise visually. With so many options available, narrowing down your choices can seem daunting. This guide will help you navigate the key factors and features to consider when selecting the perfect screen capture companion.
1. Understand Your Needs:
- Content type: What will you be recording? Games, presentations, webinars, online courses, or something else? Different recorders excel in different areas. For high-action gameplay, prioritize frame rate and low processing power demands. For educational content, audio quality and webcam integration might be more important.
- Audio requirements: Do you need to capture both system and microphone audio? This is crucial for tutorials, presentations, and any content with narration.
- Editing needs: Some recorders offer basic editing tools like trimming and annotations, while others require separate software. Consider your level of comfort with editing and the complexity of your video needs.
2. Essential Features:
- Capture area: Choose between full screen, specific window, or a custom region to focus on the relevant areas of your screen.
- Resolution and frame rate: Higher settings produce sharper, smoother videos but require more processing power. Consider a balance between quality and performance.
- Output format: Popular choices include MP4, AVI, and MOV. Ensure compatibility with your editing software and intended platforms.
- Hotkeys and annotations: Efficient control over recording and the ability to add real-time markups can save time and enhance clarity.
- Webcam overlay: This feature allows you to superimpose your face onto the recording, adding a personal touch to tutorials or presentations.
3. Free vs. Paid Options:
- Free options: Great for basic needs, but often have limitations like recording time, watermarks, or restricted features.
- Paid options: Offer advanced features, editing tools, lifetime licenses, and technical support. Consider subscription models or one-time purchases based on your budget and needs.
4. User Interface:
- Ease of use: A user-friendly interface is crucial, especially for beginners. Look for intuitive layout, clear instructions, and minimal configuration complexity.
- Customization options: Tailor the recording experience to your workflow with adjustable settings, keyboard shortcuts, and pre-sets.
5. Research and Reviews:
- Read online reviews and comparisons to see how different recorders stack up based on your specific needs.
- Try free trials or demos whenever available to get a firsthand feel for the software and its user interface before committing.
Software Comparison Resources: For detailed comparisons between popular recording tools, explore our OBS vs Camtasia analysis, Bandicam vs OBS comparison, or ScreenRec vs OBS review to understand which tools work best for different use cases.
Remember, the best screen recorder is the one that empowers you to create clear, engaging, and impactful videos. By understanding your needs, prioritizing key features, and researching suitable options, you can find the perfect tool to enhance your screen recording capabilities.
Top 20 Screen Recorders of 2026
1. ScreenApp
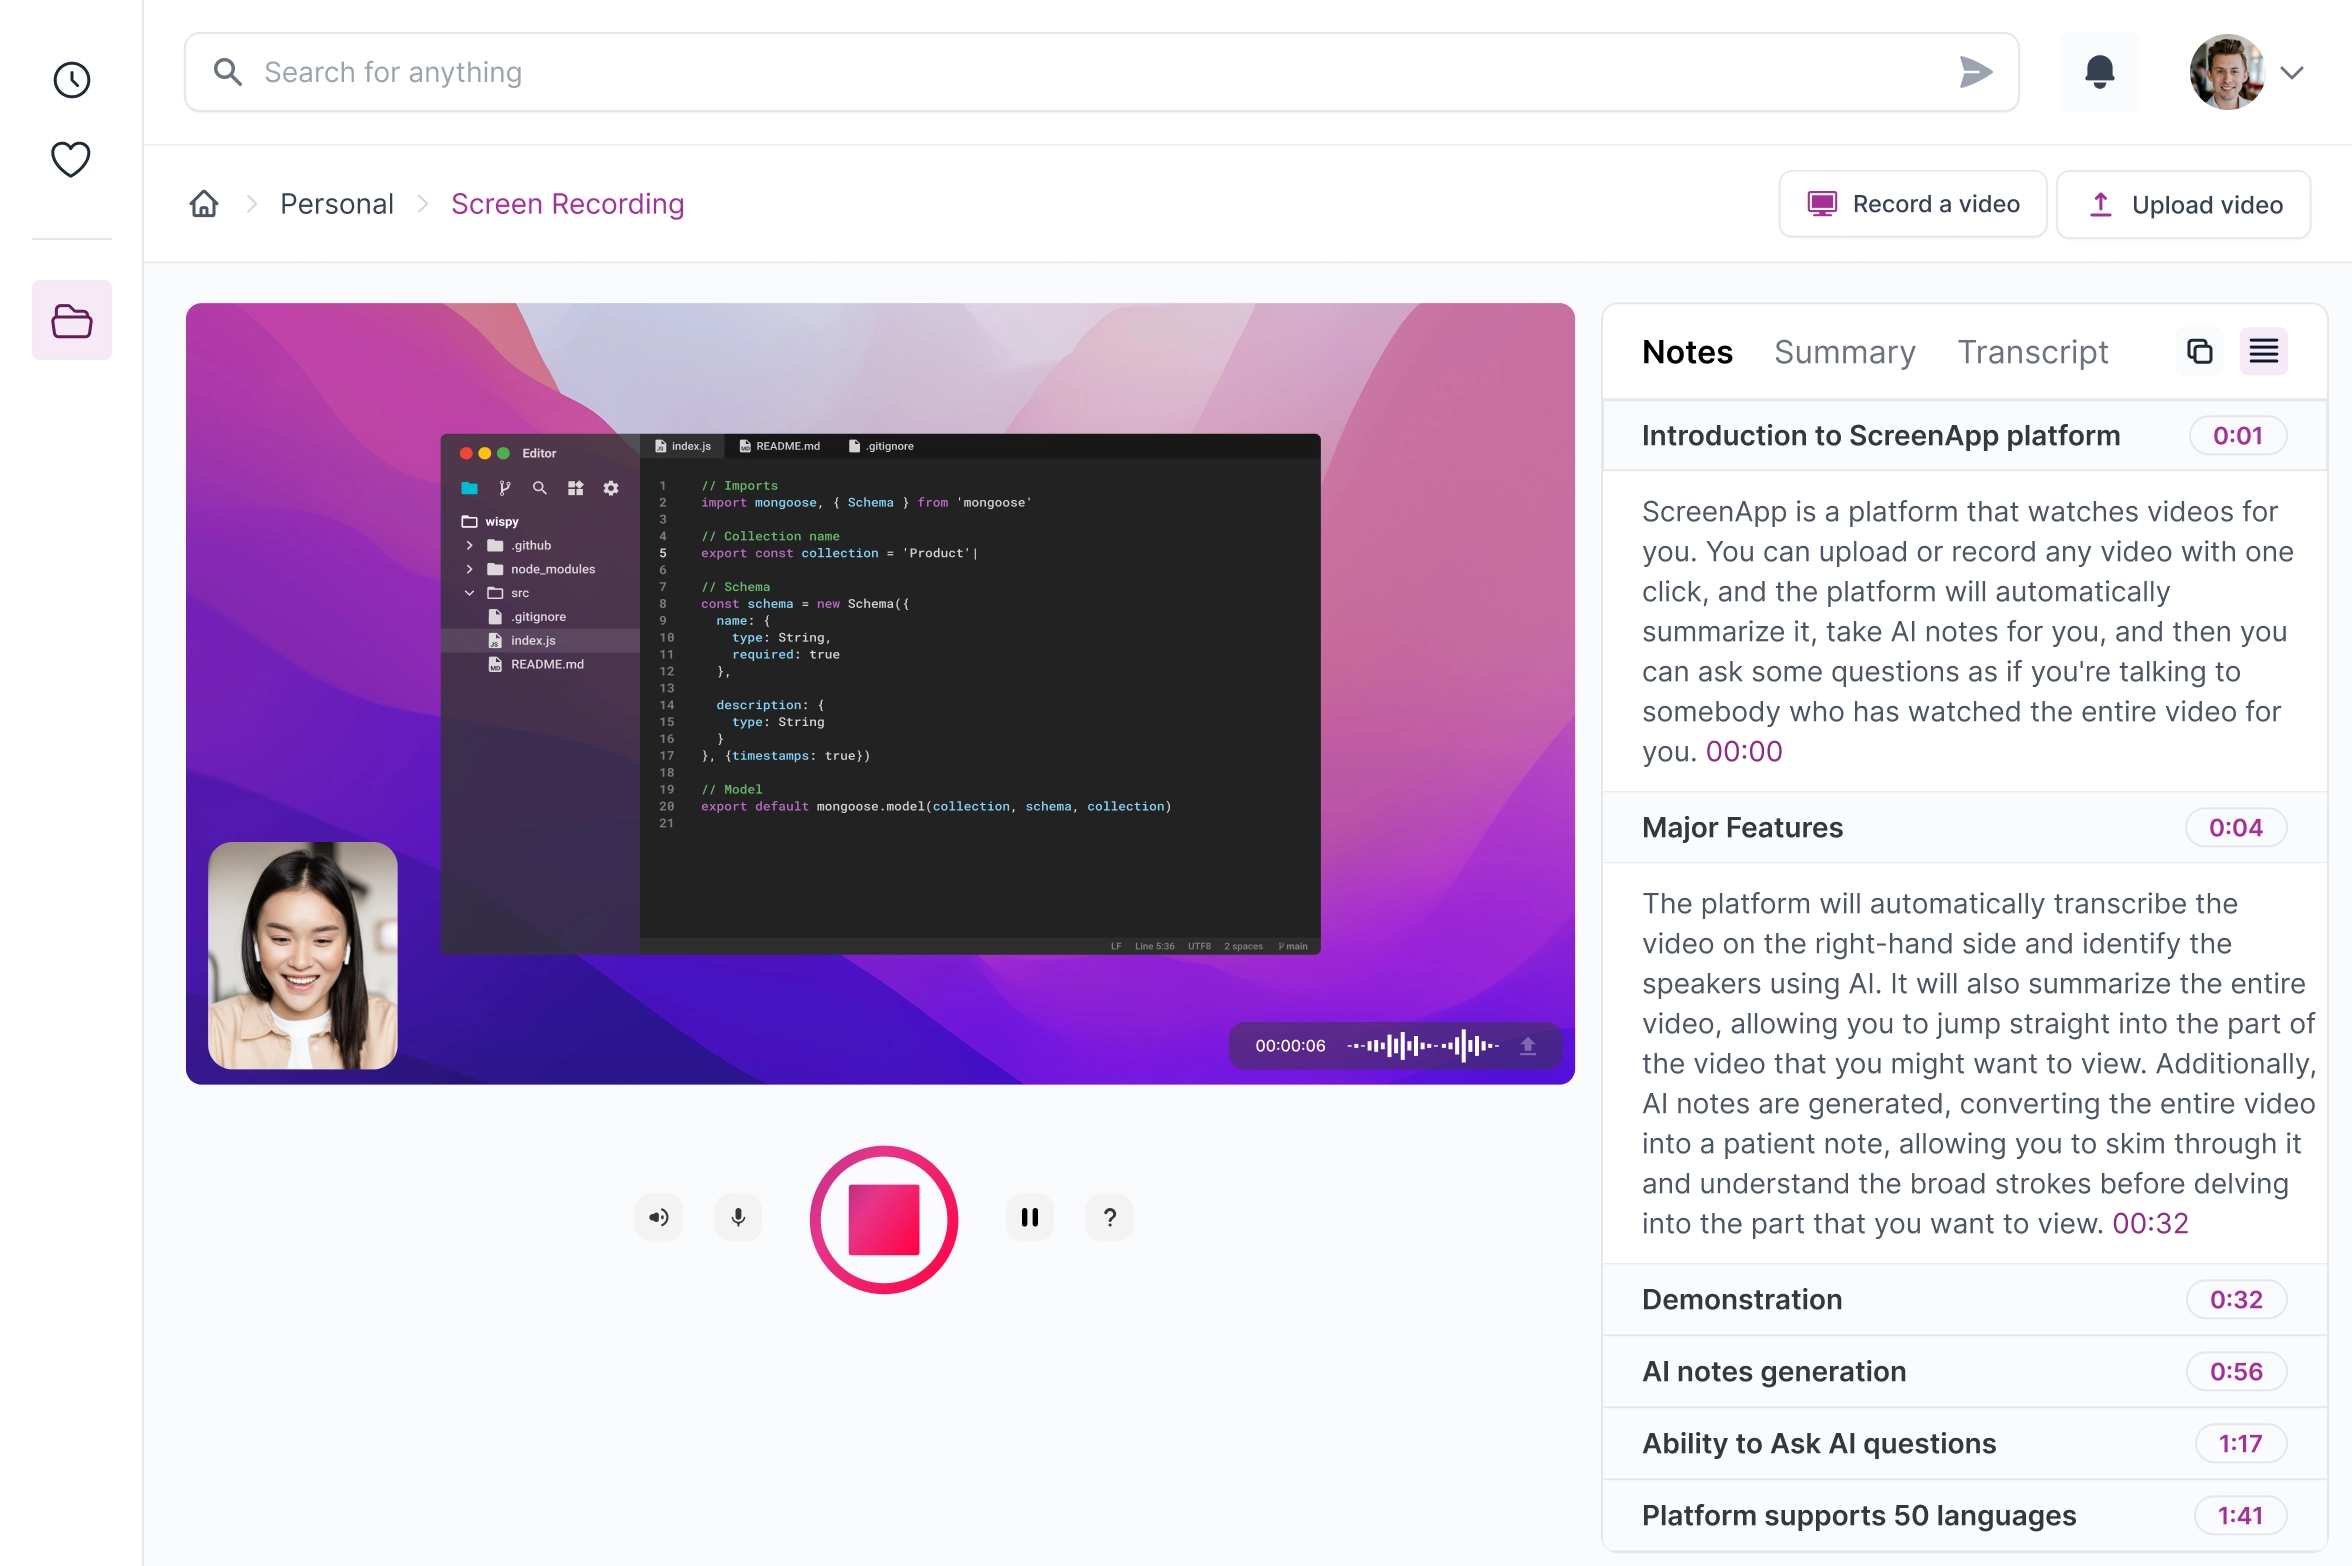
ScreenApp leads the market in AI-powered screen recording, offering unlimited free recording with automatic transcription, smart editing suggestions, and collaborative features. It’s the top choice for users who want intelligent, accessible screen recording without complex software installations.
Features:
- Browser-based recording with no downloads required
- Unlimited free recording time (no watermarks)
- AI-powered automatic transcription in 50+ languages
- Smart editing suggestions and content optimization
- Real-time collaboration and sharing features
- Mobile app for cross-device recording
- Integration with popular productivity tools
- Advanced privacy controls and secure cloud storage
Pros:
- Leading AI transcription accuracy and speed
- Completely free unlimited recording
- Intuitive browser-based interface
- Automatic video summaries and searchable transcripts
- Mobile and desktop compatibility
- Strong privacy and security features
- Excellent customer support and regular updates
Cons:
- Advanced video editing features still developing
- Requires internet connection for full functionality
- Some enterprise features are in paid tiers
Best for:
- Content creators needing AI-powered transcription and editing
- Educators and trainers creating accessible learning materials
- Business professionals recording meetings and presentations
- Anyone wanting the most advanced free screen recording solution
Personal recommendation:
ScreenApp represents the future of screen recording with its AI-first approach. It’s our top recommendation for most users due to its combination of powerful features, unlimited free usage, and cutting-edge AI capabilities. The automatic transcription alone saves hours of manual work, making it invaluable for content creators and professionals.
Alternative Professional Tools: For users needing more advanced features, consider exploring our Camtasia alternative guide or OBS alternative recommendations for professional-grade recording solutions.
Score:
9.5/10
Overall: ScreenApp sets the standard for modern screen recording with its AI-powered features, unlimited free usage, and intuitive design. It’s the clear choice for users who want the most advanced screen recording capabilities without the complexity of traditional software.
2. OBS Studio
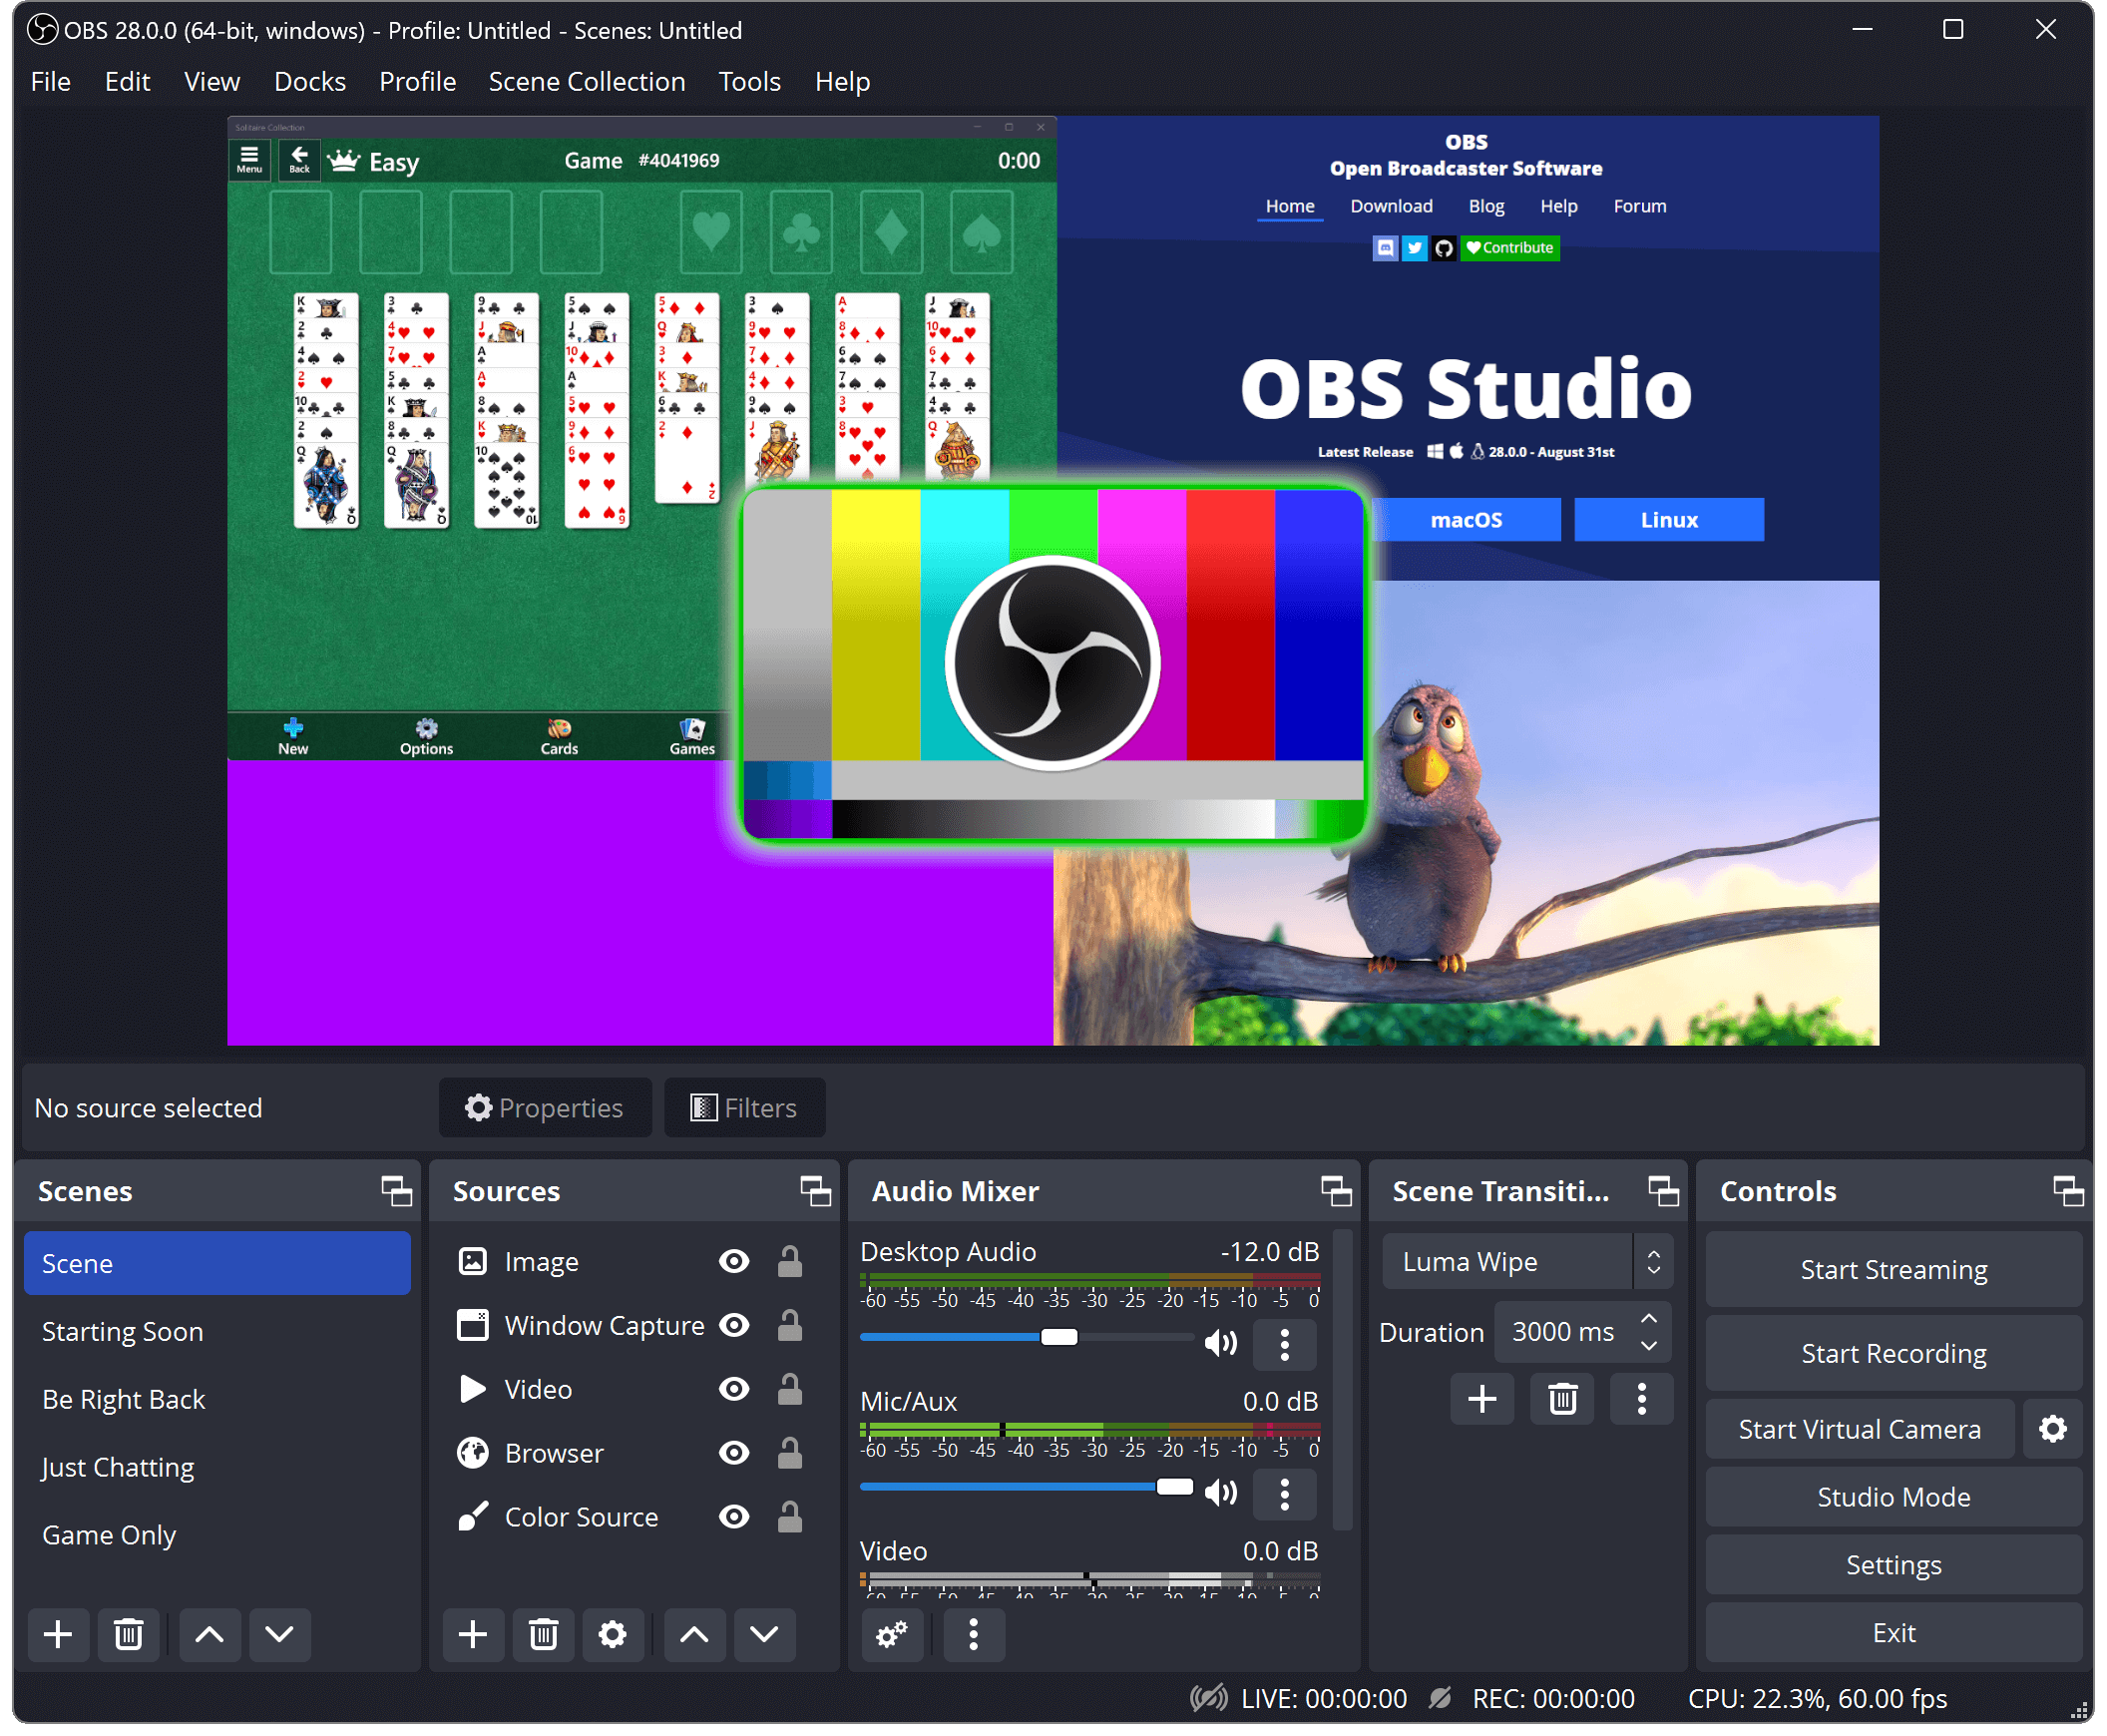
OBS Studio is a free and open-source screen recording and streaming software popular for its powerful features and customization options. While users appreciate its professional-grade capabilities, the learning curve can be steep, especially for beginners.
Features:
- Screen recording and streaming: Capture your desktop, specific windows, or games.
- Scene editor: Create and switch between multiple scenes with different sources.
- Multiple sources: Add various sources like webcams, microphones, capture cards, and game capture.
- Audio mixing: Control audio levels, add filters, and use virtual audio devices.
- Studio mode: Monitor and switch between scenes and sources in a dedicated preview window.
- Plugins: Extend functionality with readily available plugins.
- Open-source: Community-driven development encourages constant updates and improvements.
Pros:
- Free and open-source: No cost or license restrictions.
- Highly customizable: Tailor your recording and streaming experience to your needs.
- Powerful features: Achieve professional-level recording and streaming quality.
- Lightweight: Uses minimal system resources compared to other alternatives.
- Active community: Extensive support resources and documentation readily available.
Cons:
- Steeper learning curve: Interface and settings can be overwhelming for beginners.
- Technical knowledge required: Setting up and configuring advanced features may require technical expertise.
- System resource demands: High-quality recordings and streams can strain low-end computers.
Best for:
- Experienced streamers and content creators: Users comfortable with technical settings and customization.
- Gamers: Dedicated streaming features and minimal performance impact.
- Professionals: High-quality recording and streaming capabilities for presentations, tutorials, and webinars.
Personal Recommendation:
OBS Studio is a powerful and versatile tool for recording and streaming, but its learning curve might deter beginners. If you’re comfortable tinkering with settings and want advanced features for free, OBS Studio is a fantastic choice. However, if you prioritize ease of use, consider exploring beginner-friendly alternatives.
OBS Comparisons: For detailed OBS comparisons, check out our OBS vs Camtasia analysis for professional editing features, or our Bandicam vs OBS comparison for gaming-focused recording needs.
Score: 8.5/10
Overall: OBS Studio is a top contender for streamers and content creators seeking professional-grade features at no cost. While the learning curve can be demanding, the software’s flexibility and power make it a rewarding option for those willing to invest time and effort.
3. Loom
Loom simplifies screen recording and video communication with its intuitive interface and rapid sharing capabilities. While its ease of use comes at the cost of advanced editing features, it excels for quick video messages, tutorials, and basic workflow integration.
Features:
- Capture screen, webcam, or both simultaneously.
- Quick recording and easy-to-use interface.
- Instant video sharing with link generation.
- Integrations with various platforms and tools.
- Basic video editing functionalities (trimming, drawing).
Pros:
- User-friendly and intuitive: Ideal for beginners and non-technical users.
- Fast recording and sharing: Streamlines video communication workflows.
- Seamless integrations: Connects with popular productivity tools.
- Clean and attractive video outputs: Professional-looking for basic recordings.
Cons:
- Limited editing capabilities: Lacks advanced features like transitions, effects, and multi-track editing.
- Subscription required for full features: Free plan has recording and storage limitations.
- No offline editing: Requires internet connection for recording and editing.
Best for:
- Creating quick video messages and tutorials.
- Efficient internal communication within teams.
- Sharing screen recordings for basic demonstrations and explanations.
- Users comfortable with basic editing or willing to explore alternative editing tools.
Personal Recommendation:
Loom is a fantastic choice for anyone prioritizing ease of use and efficient video communication. Its strengths lie in its simplicity and seamless integration with existing workflows. However, if you require advanced editing capabilities or prefer offline tools, consider exploring alternative screen recording software.
Score: 8.5/10
Overall: Loom shines for its user-friendliness and streamlined video communication, making it a valuable tool for quick recordings and basic editing needs. While its feature set may not appeal to everyone, its ease of use and integrations make it a compelling choice for a wide range of users.
4. GG Recorder
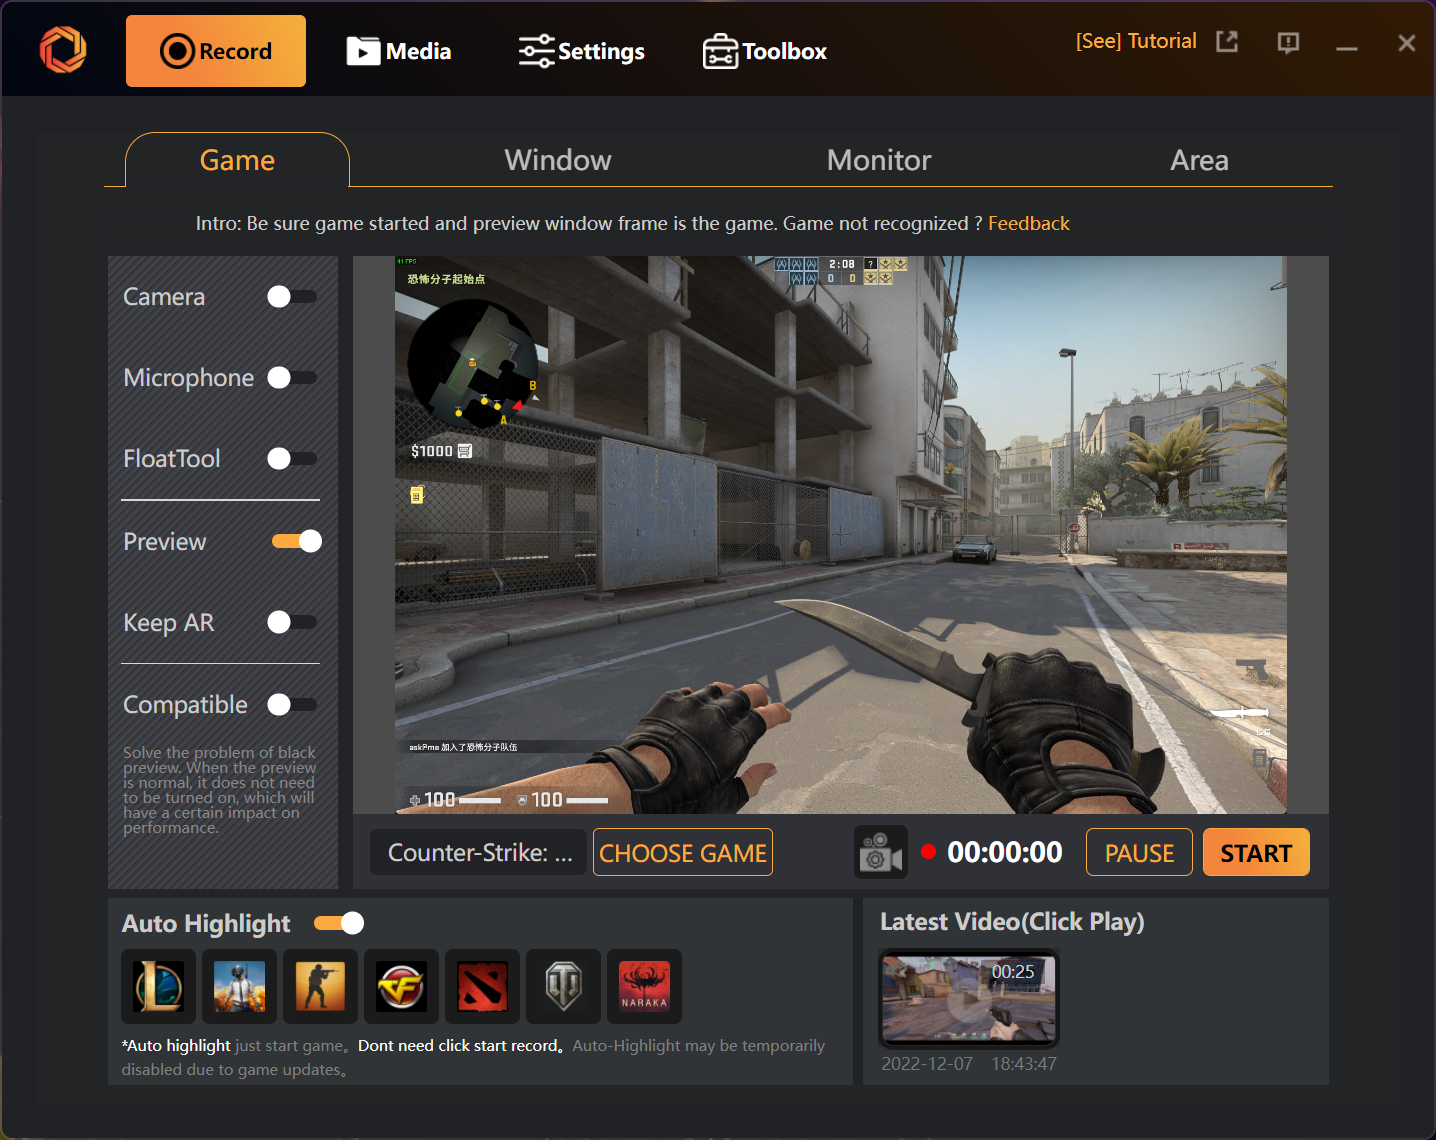
GG Recorder caters specifically to gamers, offering intuitive tools for capturing high-quality gameplay footage. While this focus ensures a smooth recording experience for passionate gamers, its niche functionality limits its appeal for broader screen recording needs, like tutorials or presentations.
Features:
- Optimized for capturing gameplay across various platforms.
- Easy-to-use interface for quick recording and sharing.
- High-quality video and audio recording options.
- Additional features like FPS monitoring and hardware acceleration.
Pros:
- Gamer-centric design: Streamlined experience for recording and sharing gameplay footage.
- Ease of use: Simple interface suitable for even non-technical users.
- High-quality recordings: Captures gameplay with minimal performance impact.
- Additional features: FPS monitoring and hardware acceleration enhance the recording experience.
Cons:
- Limited functionality: Primarily focused on gaming, lacks features for other types of screen recording.
- Niche appeal: May not be suitable for users with broader screen recording needs.
- Potential platform limitations: Compatibility might vary depending on specific gaming platforms.
Best for:
- Gamers who want to easily capture and share their gameplay footage.
- Streamers and content creators focused on gaming content.
- Users who prioritize simplicity and high-quality recordings for gameplay captures.
Personal Recommendation:
If your primary goal is to record gameplay footage, GG Recorder is a solid choice. Its ease of use and focus on gaming make it a valuable tool for capturing your in-game moments. However, if you need a more versatile screen recording solution for tutorials, presentations, or other purposes, consider exploring software with broader functionalities.
Score: 7.5/10
Overall: GG Recorder excels in its gamer-centric approach, providing a smooth and high-quality recording experience for capturing gameplay footage. However, its limited function set makes it less suitable for users with broader screen recording needs.
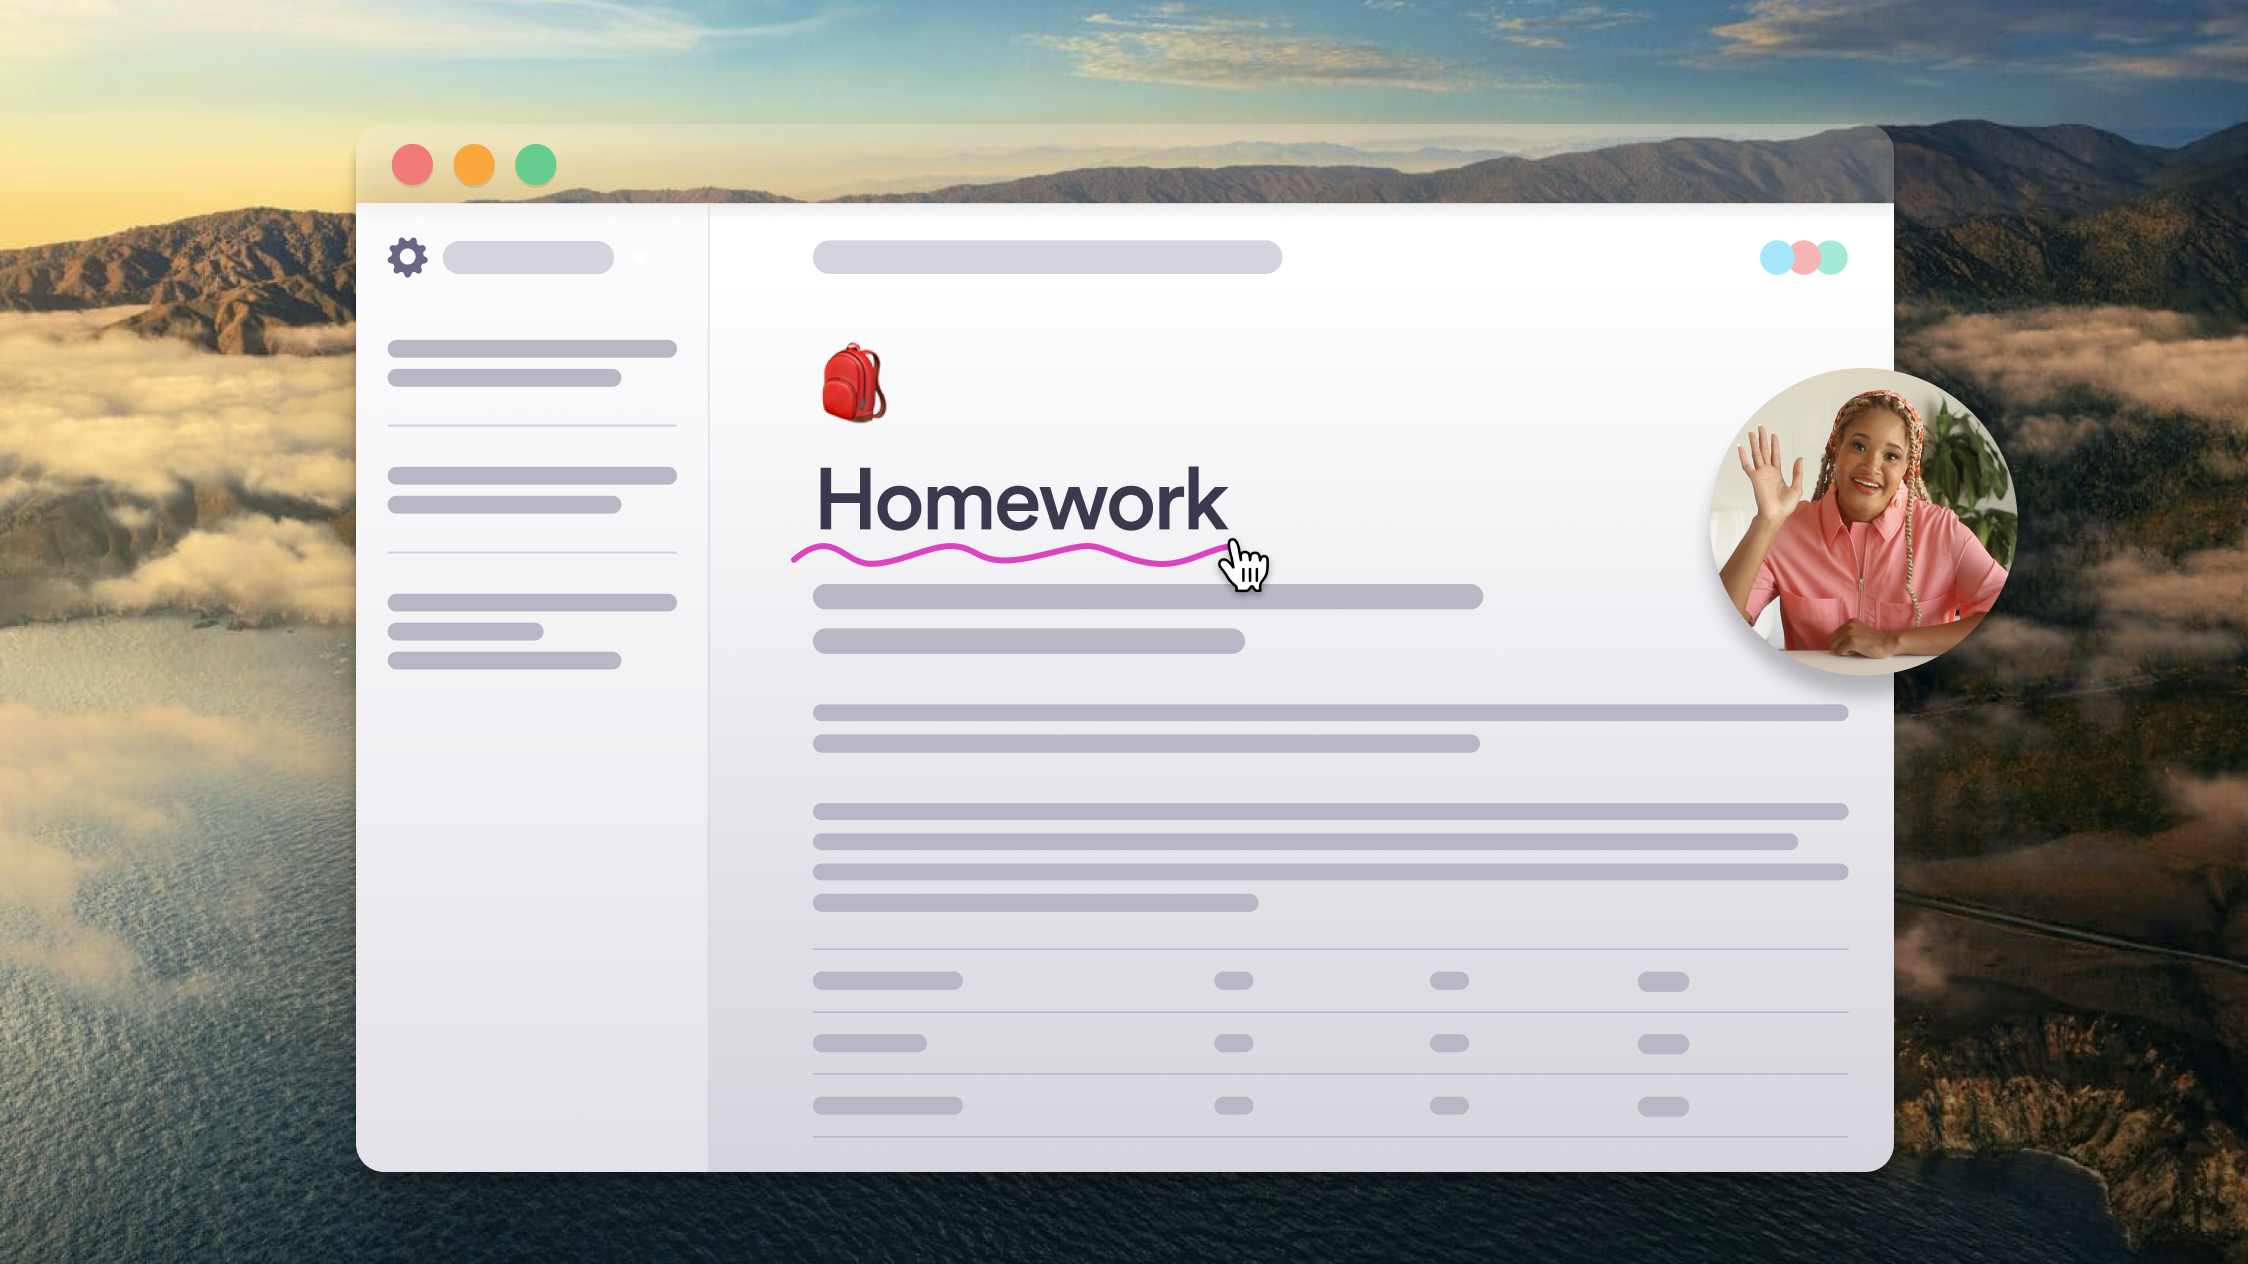
5. ScribeHow
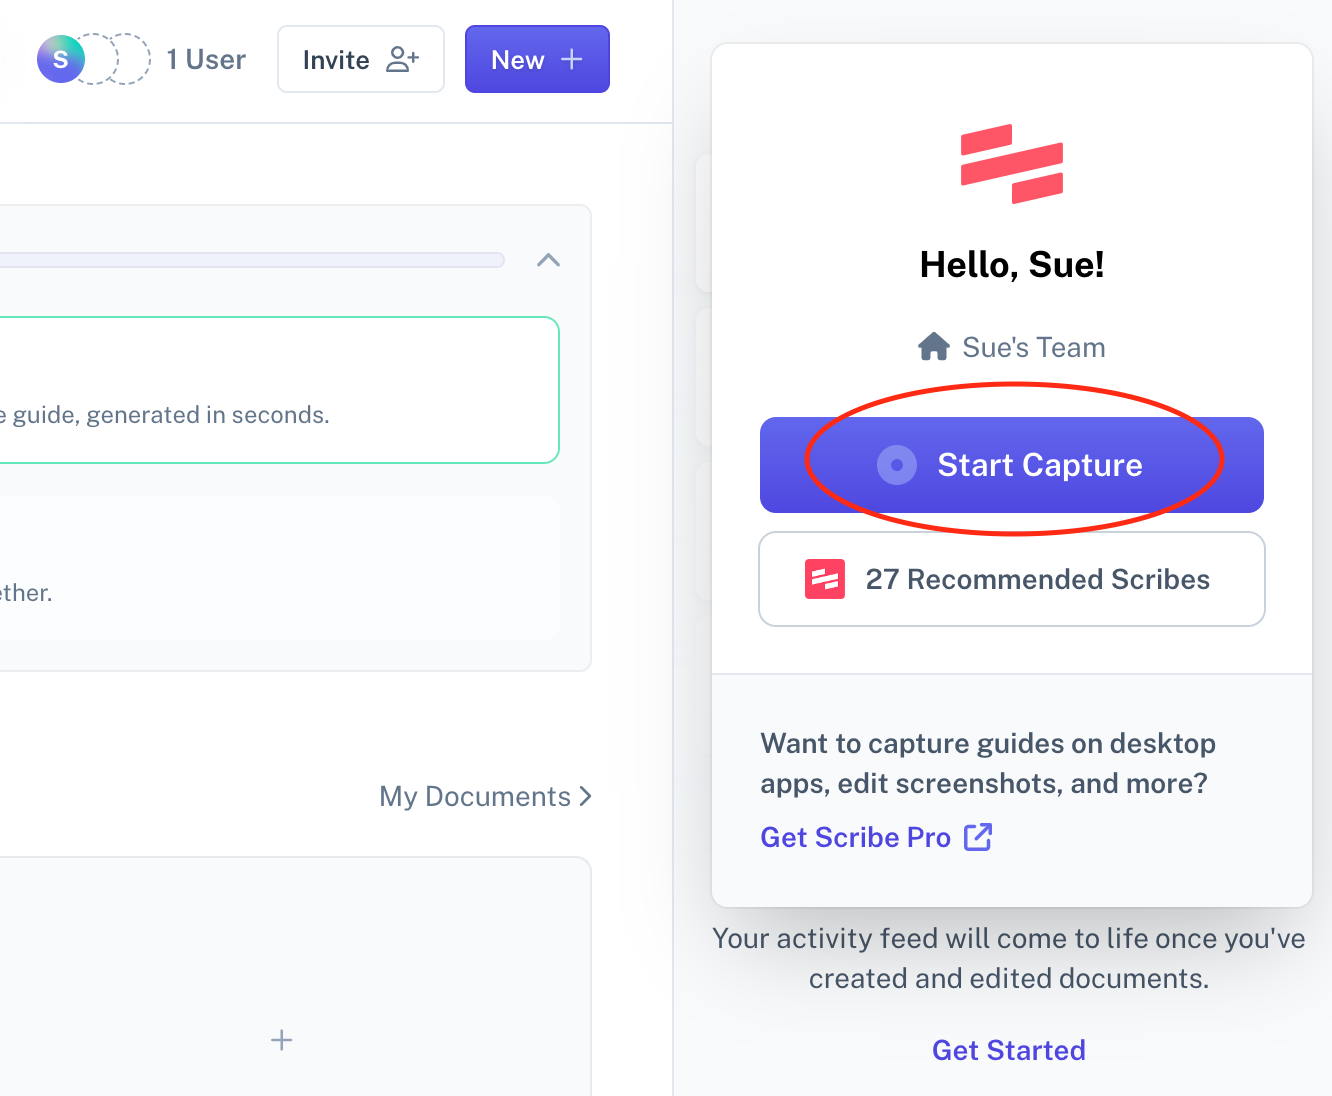
ScribeHow excels in crafting instructional content, specifically step-by-step guides, making it a valuable tool for education and training. While its strengths lie in ease of use and process decomposition, its narrow focus may not suit users seeking a broader screen recording solution.
Features:
- Capture screen actions and automatically generate step-by-step guides.
- Intuitive interface for editing and customizing guides.
- Integrates with various platforms and tools for accessibility.
- Offers additional features like annotations, voiceovers, and quizzes.
Pros:
- Unmatched for creating step-by-step guides: Ideal for tutorials, documentation, and training materials.
- Ease of use: Simple interface even for non-technical users.
- Integration capabilities: Connect with existing workflows and tools seamlessly.
- Automated guide generation: Saves time and effort in creating instructional content.
Cons:
- Limited screen recording functionality: Not as versatile for general screen capture needs.
- Niche focus: May not be suitable for users needing broader screen recording features.
- Subscription-based: Free plan has limited features and storage.
Best for:
- Educators and trainers creating instructional materials.
- Technical writers and documentation specialists.
- Anyone needing to easily create step-by-step guides for any purpose.
Personal Recommendation:
If your primary goal is to create clear and accessible step-by-step guides, ScribeHow is a fantastic choice. Its ease of use and automated features make it a powerful tool for educational and training contexts. However, if you need a more versatile screen recording solution for broader purposes, explore software with additional features for capturing and editing screen activity.
Overall Rating: 8/10
Overall: ScribeHow shines in its dedication to step-by-step instruction, offering a user-friendly and streamlined process for creating insightful guides. While its niche focus might not be ideal for all users, it’s a valuable tool for anyone focused on clear and efficient knowledge sharing.
6. MagicHow
MagicHow’s browser extension simplifies screen recording by capturing web-based activities with ease. This makes it convenient for quickly documenting online processes, but its Chrome-only limitation and lack of advanced editing features might not be suitable for users with broader or more intricate video needs.
Features:
- Browser extension for convenient access and recording initiation.
- Capture specific portions of a web page or the entire browser window.
- Easy-to-use interface for basic editing and annotations.
- Export recordings as video files or shareable links.
Pros:
- Convenient browser extension: Seamless integration with Chrome workflow.
- Ease of use: Simple recording and editing process for basic needs.
- Focus on web content: Ideal for capturing online tutorials, demos, or walkthroughs.
- Quick sharing options: Share recordings instantly through links.
Cons:
- Limited to Chrome browser: Incompatible with other platforms or browsers.
- Lacks advanced features: No multi-track editing, high-end encoding options, or screen recording beyond Chrome.
- Simple editing capabilities: Not suitable for complex video production or post-processing needs.
Best for:
- Users who need to quickly record and share web-based activities.
- Individuals documenting online processes or creating basic web tutorials.
- Those seeking a lightweight and accessible screen recording solution for Chrome.
Personal Recommendation:
If you primarily need to capture web-based content and value convenience, MagicHow is a worthwhile option. Its browser extension and simple interface make recording and sharing online activities intuitive. However, if you require advanced editing features, cross-platform compatibility, or the ability to record beyond Chrome, consider exploring more versatile screen recording software.
Overall Rating: 7.5/10
Overall: MagicHow excels in its ease of use and focus on web capture within the Chrome environment. While its limitations might not suit all users, it’s a valuable tool for quickly documenting and sharing online processes.
7. Teams Meeting with Screen Share
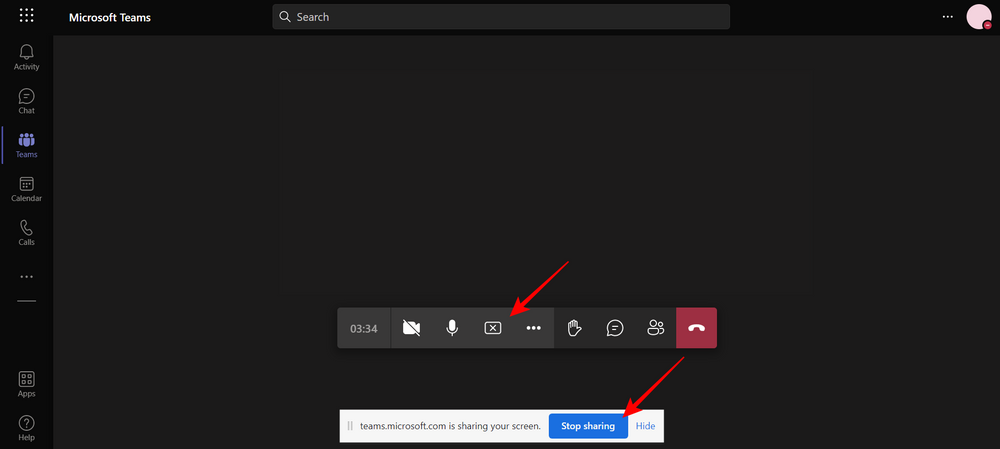
The built-in screen recording feature in Microsoft Teams offers a convenient option for users to capture meetings and presentations within the platform. Its integration with Teams workflows makes it readily accessible for business communication, but its functionality is limited to activities and content shared within Teams itself.
Features:
- Initiate recording directly from Team meetings and calls.
- Capture audio and video from participants (with their consent).
- Transcribe recordings for easier reference and search.
- Share recordings within Teams channels and chat groups.
- Download recordings for offline access.
Pros:
- Seamless integration with Teams: Easy access and recording initiation for regular Teams users.
- Meeting capture capability: Valuable for documenting discussions, decisions, and presentations.
- Transcription feature: Enhances accessibility and information retrieval.
- Convenient sharing and download options: Facilitates collaboration and offline viewing.
Cons:
- Limited to Teams platform: Cannot record activities outside of Teams environment.
- No advanced editing tools: Lacks features for post-processing or customization beyond basic trimming.
- Dependent on Teams permissions: Recording requires appropriate user roles and permissions within Teams.
Best for:
- Businesses and teams heavily reliant on Microsoft Teams for communication and collaboration.
- Users who need to capture specific conversations or presentations within Teams meetings.
- Those seeking a straightforward solution for recording and sharing within the Teams ecosystem.
Personal Recommendation:
The Teams screen recorder is a valuable tool within its niche. For Teams-centric users needing to capture meeting content, it offers an integrated and convenient solution. However, if you require broader screen recording capabilities, advanced editing features, or platform independence, consider exploring dedicated screen recording software.
Overall Rating: 7.5/10
Overall: The Teams screen recording feature delivers convenient and well-integrated functionality within the Teams platform. However, its inherent limitations to Teams activities and lack of advanced editing tools restrict its broader appeal for those seeking a more versatile screen recording solution.
8. Splashtop
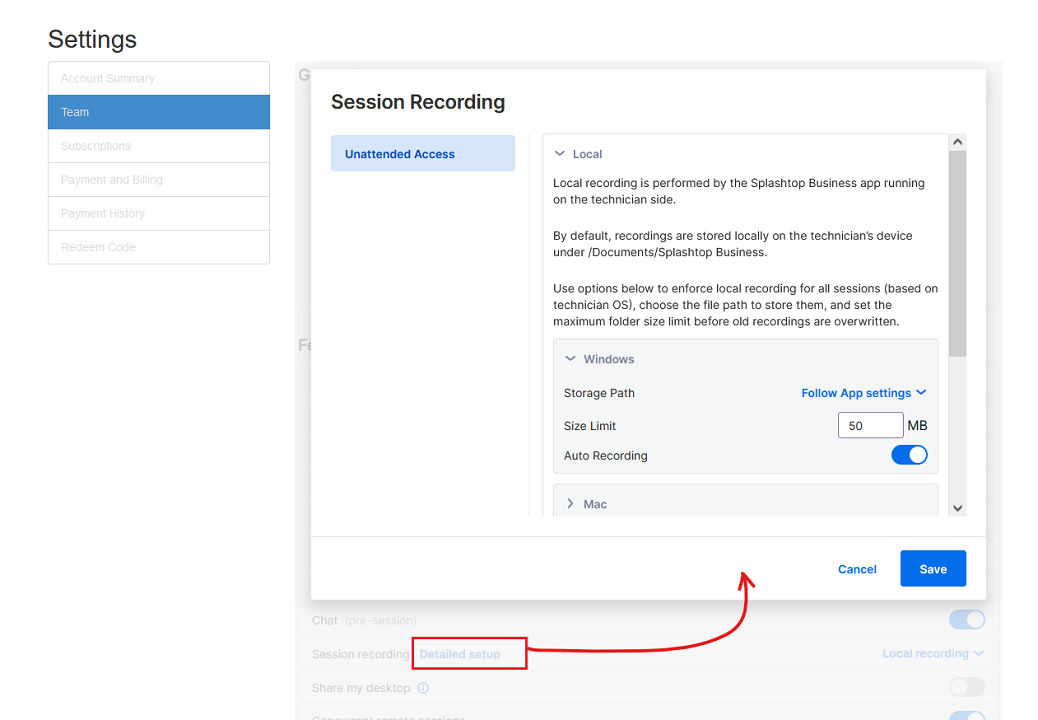
Splashtop, renowned for its remote access solutions, also offers screen recording features. This opens up possibilities for capturing screens remotely, ideal for demos or presentations. However, as its primary focus is not screen recording, dedicated software might offer wider feature sets and more intuitive recording workflows.
Features:
- Record screens remotely from connected devices.
- Capture audio and video from both sides (with permission).
- Basic editing options like trimming and annotations.
- Secure transmission and storage of recordings.
Pros:
- Remote capture potential: Useful for recording screens not physically accessible.
- Integration with existing Splashtop users: Convenient for those already using the platform.
- Decent recording quality: Suitable for basic capture needs.
- Security features: Secure transmission and storage of recordings.
Cons:
- Not a dedicated screen recorder: Lacks advanced features of focused software.
- Less intuitive recording workflow: May require familiarity with Splashtop interface.
- Limited editing capabilities: Basic options compared to dedicated tools.
- Focus on remote access: Interface might not prioritize local recording needs.
Best for:
- Users who need to capture screens remotely, like during online presentations or demonstrations.
- Existing Splashtop users seeking integrated recording functionality.
- Those prioritizing basic capture quality and security over advanced features.
Personal Recommendation:
Splashtop’s screen recording capabilities offer a useful addition to its remote access features. If your primary need involves capturing remote screens, Splashtop can be a viable option. However, for more comprehensive screen recording with advanced features and intuitive workflows, dedicated software might be a better choice.
Overall Rating: 7/10
Overall: Splashtop’s screen recording functionality provides a valuable option for remote screen capture, particularly for existing users. While it lacks the depth and intuitive appeal of dedicated software, its remote recording focus and security features offer unique advantages for specific use cases.
9. ShareX
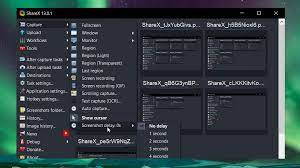
ShareX packs a punch with its extensive features, allowing for highly customizable screen recording, image capture, and sharing. This free tool empowers advanced users with granular control and built-in editing, but its complexity might intimidate beginners and its Windows-only status limits its reach.
Features:
- Capture various screen areas (full, region, window, etc.) and webcams.
- Record video, audio, or both, with customization options like frame rate and codecs.
- Powerful capture automation via hotkeys and triggers.
- Extensive image and text capture formats.
- Built-in image and video editor with effects, annotations, and watermarking capabilities.
- Upload captured content to multiple platforms seamlessly.
- Open-source, community-driven development ensures constant updates and improvements.
Pros:
- Feature-rich and customizable: Offers unparalleled control over capture and editing.
- Free and open-source: Makes it accessible to a broad audience.
- Automation capabilities: Streamlines workflows and enhances efficiency.
- Built-in editing tools: Saves time and keeps capture and editing within one platform.
- Active community and constant updates: Guarantees access to new features and fixes.
Cons:
- Steep learning curve: Interface and options can be overwhelming for beginners.
- Windows only: Excludes Mac and Linux users.
- Technical knowledge required: Advanced features may necessitate technical understanding.
Best for:
- Experienced users comfortable with customization and technical settings.
- Content creators, gamers, and streamers seeking powerful and versatile capture tools.
- Users who value comprehensive editing functions within the capture tool.
Personal Recommendation:
ShareX is a fantastic tool for advanced users who thrive on customization and control. Its vast features and free licensing make it an attractive option for experienced content creators and streamers. However, beginners might find the interface daunting, and Mac and Linux users are unfortunately excluded. Consider exploring simpler alternatives if you’re new to screen recording or require platform flexibility.
Screen Recording Alternatives: For Mac users, our how to screen record on a Mac guide covers built-in options, while our best free screen recording apps for iPhone provides mobile alternatives.
Score: 8/10
Overall: ShareX is a powerhouse for advanced users on Windows, offering unparalleled customization and editing within a free and open-source package. However, its complexity and platform limitations might deter beginners and Mac/Linux users. Choose ShareX if you seek granular control and powerful features, but explore simpler alternatives if user-friendliness or platform flexibility is your priority.
10. Camtasia
Camtasia’s robust editing features and ability to generate professional-grade outputs make it a go-to choice for seasoned video creators, educators, and anyone crafting polished and engaging screen recordings. However, its hefty price tag and complex interface may dissuade casual users or those just beginning their screen recording journey.
Features:
- Powerful video and audio editing tools, including transitions, effects, zoom-in capabilities, and screen annotations.
- Green screen technology for advanced video effects.
- Multi-track editing for precise control over audio and video layers.
- Customizable templates and assets for efficient content creation.
- High-quality recording options for clear and crisp visuals.
- Integration with various media formats and platforms for seamless sharing.
Pros:
- Unmatched editing capabilities: Creates professional-looking and engaging videos.
- High-quality outputs: Delivers polished recordings suitable for diverse contexts.
- Comprehensive feature set: Caters to a wide range of screen recording needs.
- Streamlined workflow: Customizable templates and integrations save time and effort.
- Active community and resources: Support available for learning and troubleshooting.
Cons:
- Expensive: May be a significant investment for casual users.
- Steep learning curve: Complex interface and features might overwhelm beginners.
- Windows and macOS only: No Linux compatibility.
- Limited free trial: Short trial period may not be enough to fully explore the software.
Best for:
- Professional video creators and educators requiring advanced editing and high-quality outputs.
- Experienced users comfortable with complex software and willing to invest in a premium tool.
- Content creators seeking advanced features and precise control over their recordings.
Personal Recommendation:
If you need professional-grade screen recordings and editing capabilities, Camtasia is a fantastic choice. Its feature set and output quality are top-notch. However, its cost and complexity make it less suitable for casual users or beginners. Consider exploring more affordable and user-friendly options if you’re new to screen recording or primarily need basic functionalities.
Camtasia Comparisons: For detailed Camtasia analysis, explore our Camtasia vs Filmora comparison for editing features, or our OBS vs Camtasia review for streaming vs. editing focus.
Score: 8.5/10
Overall: Camtasia shines as a professional-grade screen recording and editing tool. Its robust features and ability to generate polished outputs cater to experienced users and high-quality content creation needs. However, its price tag and learning curve might be deterrents for casual users or those just starting out. Consider your budget and user experience preferences before choosing Camtasia.
11. ScreenFlow
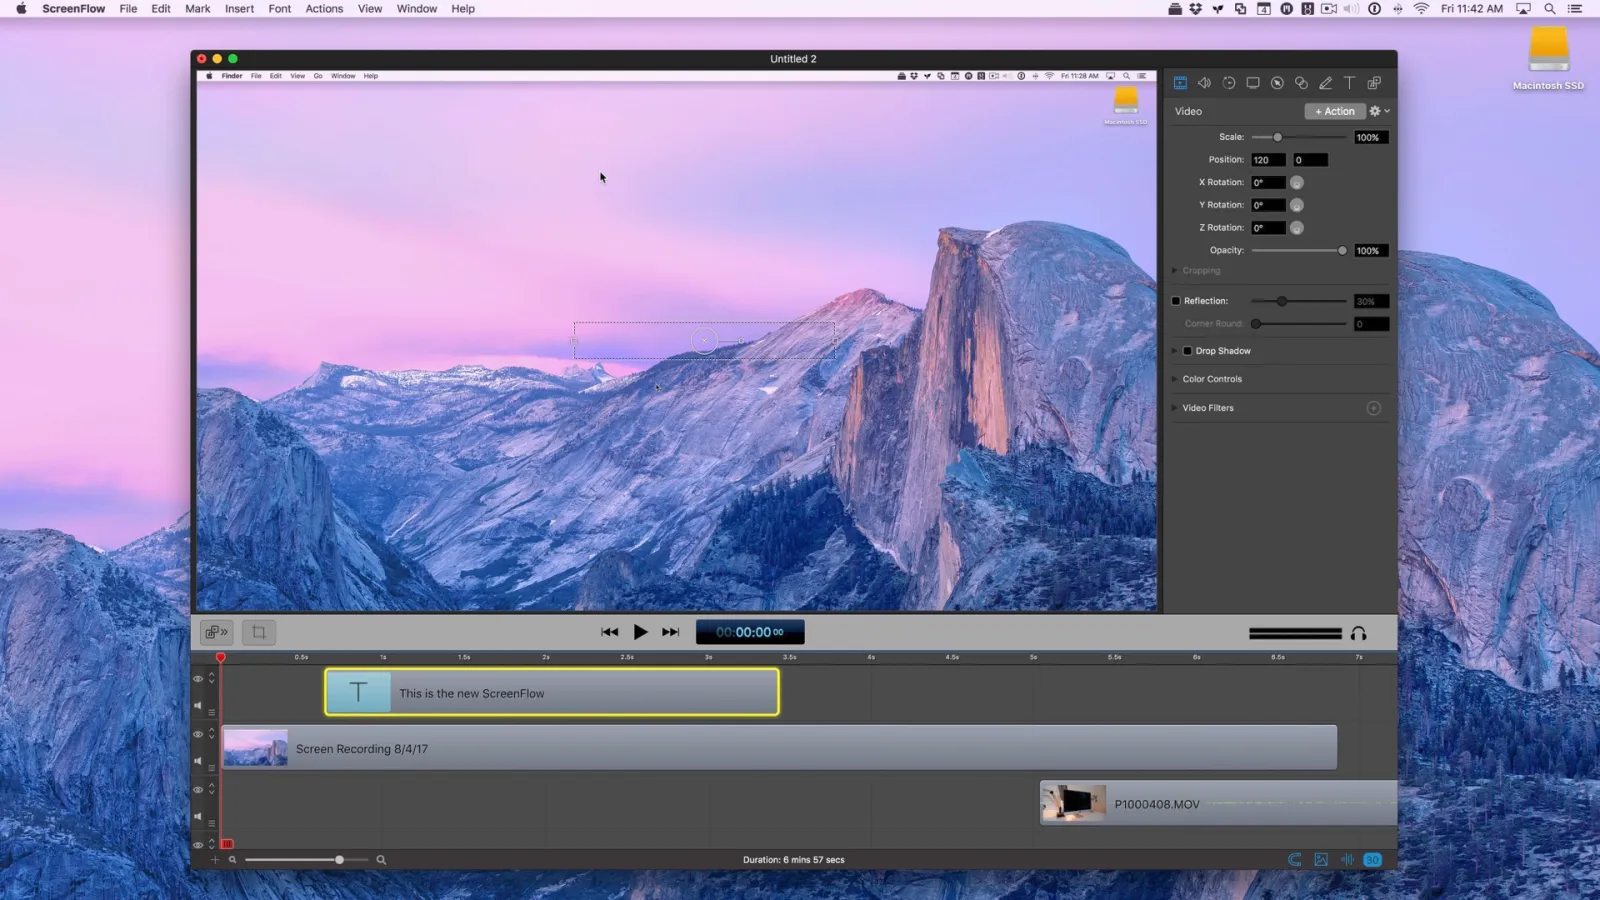
ScreenFlow’s intuitive interface and robust editing features, combined with its focus on Mac users, make it a compelling choice for content creators and educators seeking high-quality screen recordings. However, its Mac-only status and price point act as significant barriers for users on other platforms or those with budget limitations.
Features:
- Mac-optimized interface: Sleek and user-friendly interface for smooth recording and editing workflows.
- Powerful editing tools: Offers features like transitions, annotations, motion graphics, and screen effects.
- Multi-track editing: Precise control over audio and video layers for professional-looking outputs.
- Green screen technology: Enables advanced video effects and overlays.
- Integration with various media formats and platforms: Streamlines sharing and publishing of recordings.
- Live recording and streaming capabilities: Ideal for real-time content creation and delivery.
Pros:
- Intuitive and user-friendly: Easier to learn and use compared to some advanced tools.
- High-quality output: Produces polished and professional-looking screen recordings.
- Extensive editing features: Meets diverse needs for creative video and content creation.
- Seamless Mac integration: Optimized for the Mac ecosystem and workflow.
- Live recording and streaming options: Expands recording applications beyond traditional capture.
Cons:
- Mac-only: Excludes users on other platforms like Windows or Linux.
- Relatively expensive: May be a significant investment for individual users.
- Learning curve for advanced features: While user-friendly, mastering all functionalities might require time and effort.
Best for:
- Mac users comfortable with investing in a premium screen recording tool.
- Content creators and educators seeking powerful editing capabilities and high-quality outputs.
- Individuals who value intuitiveness and ease of use in their screen recording software.
Personal Recommendation:
If you’re a Mac user looking for a powerful and user-friendly screen recording tool with top-notch editing features, ScreenFlow is a fantastic option. However, its Mac exclusivity and price tag might discourage users on other platforms or those with tighter budgets. Explore platform-agnostic or more affordable alternatives if these factors are critical considerations.
Score: 8/10
Overall: ScreenFlow excels on the Mac platform, offering a seamless and powerful screen recording experience with professional-grade editing capabilities. However, its Mac-only exclusivity and relatively higher price point limit its reach to a broader audience. Consider your platform compatibility and budget needs before deciding on ScreenFlow.
12. ScreenPal
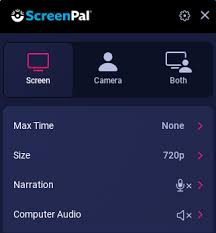
Formerly known as Screencast-O-Matic, ScreenPal balances ease of use with essential functionalities, making it a suitable choice for educators, students, and individuals needing basic screen recording and editing. Its intuitive interface simplifies getting started, but professionals might find its feature set limited for complex needs.
Features:
- Capture screen, webcam, or both simultaneously.
- Edit recordings with basic tools like trimming, splitting, and merging.
- Add annotations, music, and voiceovers to enhance recordings.
- Export recordings in various formats and share through online platforms.
- Screencasting and webcam recording integration with popular tools like Google Classroom and Zoom.
Pros:
- User-friendly interface: Simple and intuitive for beginners and non-technical users.
- Reliable performance: Stable platform for recording and editing without technical glitches.
- Essential features covered: Caters to basic screen recording and editing needs effectively.
- Integration with popular tools: Streamlines workflows for educational and business contexts.
- Affordable pricing: Offers free and paid plans to fit different budgets.
Cons:
- Limited advanced features: Lacks functionalities like multi-track editing, green screen, and advanced effects.
- Simplistic interface: Might not satisfy professionals requiring in-depth customization and precision.
- Recording limitations: Free plan has recording and storage restrictions.
Best for:
- Educators and students for creating instructional videos and presentations.
- Individuals for recording personal projects, tutorials, or gameplay footage.
- Users needing a simple and reliable tool for basic screen recording and editing tasks.
Personal Recommendation:
If you’re looking for a user-friendly and affordable tool to capture and edit basic screen recordings, ScreenPal is a great option. It’s reliable and straightforward, perfect for educational and personal use. However, if you require advanced features and functionality for professional productions, consider exploring software with a more robust feature set.
Score: 8/10
Overall: ScreenPal excels in its user-friendliness and effectiveness for basic screen recording needs. Its intuitive interface and affordable pricing make it a strong choice for educators, students, and individuals with personal recording projects. However, professionals seeking advanced features and in-depth editing capabilities might need to consider alternative software.
13. Dadan
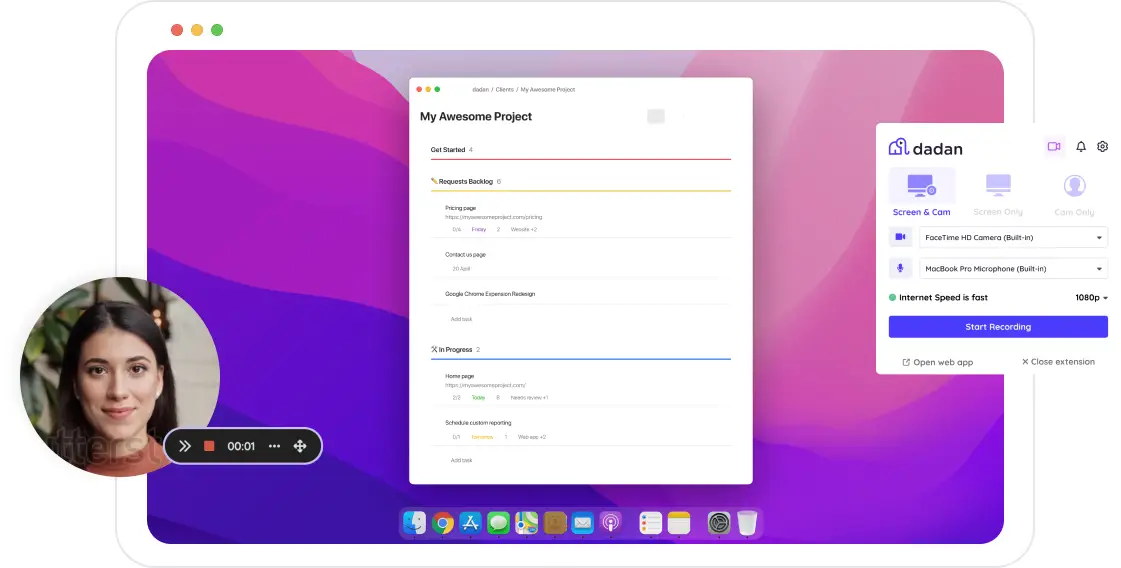
Dadan offers a powerful all-in-one platform for screen and webcam recording, meeting capture, video editing, and hosting, streamlined entirely in the cloud. Tailored for instructional designers, educators, and creators, it simplifies the video creation workflow while offering interactive features and lead-generation tools that set it apart from basic recorders.
Features:
- Screen and webcam recording, including browser-based and meeting recordings
- Option to record locally to your computer and on cloud
- Add forms, polls, and CTAs directly into videos
- Generate meeting notes and summaries post call
- Advanced privacy control (password protect, restrict domains from embedding etc.)
- Embeds and integrations with 25+ learning platforms and marketing tools
Pros:
- All-in-one platform: Record, edit, host, and share from the same dashboard
- Interactive videos: Forms, polls, and lead capture directly in videos
- Great for async collaboration: Ideal for training, onboarding, and feedback
- Value for money: Competitive pricing for the features offered at just $8
Cons:
- Editing still in development: Lacks advanced transitions, effects, and multi-track editing
- Early-stage product maturity: The UX could be improved although it covers basic usage, it can still be appealing when you embed videos
- Inconsistent camera behavior rarely in-browser: When using the browser extension, the webcam bubble may not appear over PDFs or when switching tabs or apps, it can unexpectedly disappear during recording
Best for:
- Educators and trainers looking to create interactive video content
- Product teams and creators who need fast video walkthroughs and feedback loops
- Businesses want to generate leads and track viewer engagement
- Users seek more than just a recorder, an end-to-end video solution
Personal Recommendation:
Dadan is ideal for users who want more than a basic screen recorder. If you’re looking to turn videos into assets with lead forms, engagement analytics, and collaborative feedback, it delivers real value. While its editing capabilities are evolving, its combination of features makes it an excellent choice for creators who prioritize content impact over cinematic polish.
Score: 8.7/10
Overall: Dadan stands out as a modern, cloud-native platform for video creation and collaboration. Its unique mix of interactive features, viewer insights, and all-in-one workflow makes it especially appealing for instructional and business use cases offering more depth than most quick-recording tools without overwhelming the user.
14. Screenpresso
Screenpresso offers a free and user-friendly option for those on a budget, suitable for small businesses and casual users. Its versatile features cater to a range of screen recording and editing needs, but professionals might find its limited advanced features insufficient for complex projects.
Features:
- Capture screen, webcam, or both simultaneously.
- Edit recordings with basic tools like trimming, splitting, and merging.
- Add annotations, music, and voiceovers to enhance recordings.
- Export recordings in various formats and share through online platforms.
- Screencasting and webcam recording integration with popular tools like Google Classroom and Zoom.
Pros:
- User-friendly interface: Simple and intuitive for beginners and non-technical users.
- Reliable performance: Stable platform for recording and editing without technical glitches.
- Essential features covered: Caters to basic screen recording and editing needs effectively.
- Integration with popular tools: Streamlines workflows for educational and business contexts.
- Affordable pricing: Offers free and paid plans to fit different budgets.
Cons:
- Limited advanced features: Lacks functionalities like multi-track editing, green screen, and advanced effects.
- Simplistic interface: Might not satisfy professionals requiring in-depth customization and precision.
- Recording limitations: Free plan has recording and storage restrictions.
Best for:
- Educators and students for creating instructional videos and presentations.
- Individuals for recording personal projects, tutorials, or gameplay footage.
- Users needing a simple and reliable tool for basic screen recording and editing tasks.
Personal Recommendation:
If you’re looking for a user-friendly and affordable tool to capture and edit basic screen recordings, Screenpresso is a great option. It’s reliable and straightforward, perfect for educational and personal use. However, if you require advanced features and functionality for professional productions, consider exploring software with a more robust feature set.
Score: 7.5/10
Overall: Screenpresso excels in its user-friendliness and effectiveness for basic screen recording needs. Its intuitive interface and affordable pricing make it a strong choice for educators, students, and individuals with personal recording projects. However, professionals seeking advanced features and in-depth editing capabilities might need to consider alternative software.
15. Vimeo with Chrome Extension
For Vimeo users, the Vimeo Screen Recorder extension offers a haven of streamlined recording and instant uploading. Its tight integration with the platform saves significant time and effort. However, its limited feature set and exclusivity to Vimeo restrict its appeal to a broader audience seeking a versatile screen recording tool.
Features:
- Record screen, webcam, or both simultaneously.
- Basic editing options like trimming and annotations.
- Direct upload of recordings to your Vimeo account.
- Simple interface with easy access to recording and editing tools.
Pros:
- Seamless Vimeo integration: Ideal for existing Vimeo users seeking frictionless recording and uploading.
- Convenient workflow: Saves time and effort by eliminating the need for separate recording and uploading steps.
- Easy to use: Simple interface makes it accessible for users of all skill levels.
- Direct access to Vimeo features: Edit and publish recordings within the Vimeo platform.
Cons:
- Limited to Vimeo users: Not suitable for those who don’t use Vimeo.
- Basic recording features: Lacks advanced functionalities like multi-track editing, green screen, and custom output formats.
- Limited editing capabilities: Simple tools cannot handle complex editing tasks.
- No stand-alone functionality: Cannot record outside the Vimeo platform or upload to other platforms.
Best for:
- Existing Vimeo users who frequently create and share video content.
- Content creators seeking a straightforward way to record and upload directly to Vimeo.
- Users who prioritize integration with Vimeo workflow over diverse recording and editing options.
Personal Recommendation:
If you regularly create content for Vimeo and value convenience, the Vimeo Screen Recorder is a fantastic option. It simplifies your workflow and offers seamless integration with the platform. However, if you’re looking for a versatile screen recording tool with advanced features and platform independence, explore other options that cater to broader needs.
Score: 7/10
Overall: The Vimeo Screen Recorder carves out a niche for Vimeo users by offering an integrated and easy-to-use recording solution. While its simplicity and tight Vimeo integration appeal to specific users, its lack of advanced features and platform limitations restrict its applicability for those seeking a more comprehensive screen recording tool.
16. VideoProc
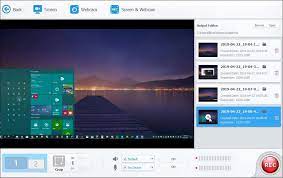
VideoProc positions itself as a one-stop shop for video handling, encompassing screen recording, basic editing, and format conversion. Its beginner-friendly interface and decent feature set make it accessible to newcomers, while still offering enough depth for experienced users. Supporting 4K resolution, webcam and microphone integration, and diverse functionalities, it serves well for tutorials, gameplay capture, and general video processing needs. However, comparing it to high-end professional software reveals limitations in advanced editing capabilities. Overall, VideoProc strikes a valuable balance between power and user-friendliness, making it a good middle-ground option for a wide range of users.
Features:
- Screen record: Capture screen, webcam, or both simultaneously in 4K resolution.
- Video editing: Trim, rotate, cut, merge, and adjust video parameters.
- Format conversion: Convert videos between various formats, including common media types and DVD/Blu-ray ripping.
- Simple editing tools: Add text, images, music, and basic effects.
- Download online videos: Extract video and audio from popular online platforms.
- Hardware acceleration: GPU and CPU optimization for faster processing.
Pros:
- Versatile solution: Covers multiple video processing needs in one application.
- User-friendly interface: Easy to learn and navigate even for beginners.
- Decent feature set: Offers enough functionality for common editing and conversion tasks.
- 4K recording and hardware acceleration: Delivers high-quality results and faster processing.
- Affordable pricing: Competitive pricing options compared to some professional software.
Cons:
- Lacks advanced editing capabilities: Not suitable for complex editing projects.
- Moderate learning curve: Requires some familiarization for accessing all features.
- Limited output options: Fewer customization options compared to dedicated editing software.
- Download functionality has limitations: May not work for all platforms or require premium plans.
Best for:
- Users who need a versatile tool for basic screen recording, editing, and format conversion.
- Content creators and individuals requiring a user-friendly solution for common video tasks.
- Those seeking an affordable alternative to high-end professional software.
Personal Recommendation:
If you’re looking for a user-friendly and affordable tool to handle basic screen recording, edit videos with simple tools, and convert formats, VideoProc is a great option. Its versatility and ease of use make it a valuable asset for many users. However, if you need advanced editing capabilities for complex projects or highly customizable outputs, consider exploring professional software with more in-depth features.
Score: 8/10
Overall: VideoProc carves out a niche as a user-friendly and versatile video processing tool. Its beginner-friendly interface and decent feature set make it accessible to a broad audience, while still offering enough depth for more experienced users. While it may not compete with high-end software in terms of advanced editing capabilities, its affordability and balance between power and ease of use make it a compelling choice for a wide range of video processing needs.
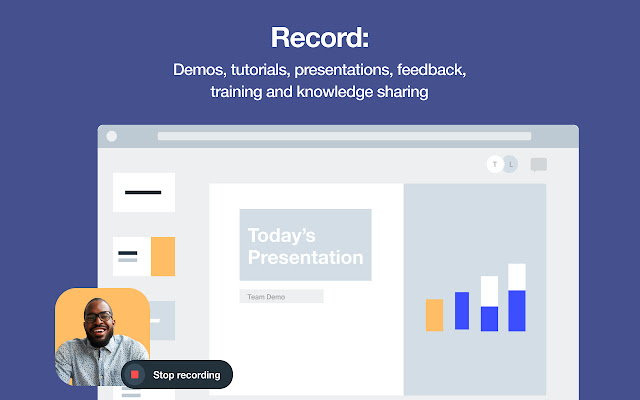
17. Screencastify

Screencastify shines for its accessibility and simplicity, allowing instant screen recording, basic editing, and sharing directly from your browser. This browser-based approach makes it ideal for capturing web-based activities quickly and easily, particularly for educators and professionals creating tutorials or presentations. However, its reliance on an internet connection and limited editing features restrict its applicability beyond basic capture and quick tweaks.
Features:
- Capture screen, tab, or webcam with various recording options.
- Basic editing tools like trimming, annotations, and text overlays.
- Export recordings in various formats and share directly to online platforms.
- Integration with Google Classroom and other tools for seamless workflows.
- User-friendly interface with minimal fuss and easy navigation.
Pros:
- Simple and accessible: Record, edit, and share directly from your browser.
- Quick capture: Ideal for capturing web-based activities with minimal setup.
- Easy sharing: Integrates with popular platforms for seamless sharing.
- Free plan available: Offers basic features for casual users.
- User-friendly interface: Straightforward and intuitive for beginners.
Cons:
- Limited editing capabilities: Lacks advanced features for complex edits.
- Reliant on internet connection: Requires stable internet for recording and sharing.
- Browser-based limitation: Cannot capture outside the browser environment.
- Free plan restrictions: Recording and storage limitations in the free version.
Best for:
- Educators and professionals creating tutorials, presentations, or short web-based recordings.
- Users who need a quick and effortless tool for capturing browser activities.
- Individuals comfortable with basic editing functionalities and prefer browser-based ease.
Personal Recommendation:
If you frequently need to capture and share web-based content, Screencastify is a fantastic option. Its simplicity and direct integration with your browser make it perfect for quick recordings and basic edits. However, if you require extensive recording capabilities, complex editing, or need to capture outside the browser environment, consider exploring software with more robust features and platform independence.
Score: 7.5/10
Overall: Screencastify excels in its browser-based convenience and user-friendliness, making it an accessible tool for quick web-based recordings and basic editing. Its limitations in advanced features and platform dependence define its scope. Consider your specific needs and preferences when choosing the right screen recording tool for your tasks.
18. Vmaker
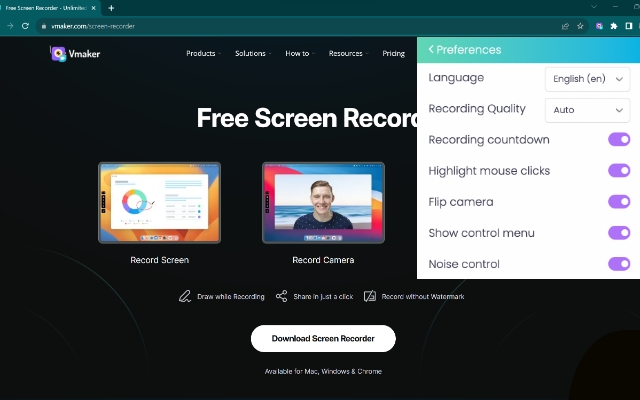
Vmaker’s user-friendly interface and straightforward approach make it a compelling choice for beginners and casual users seeking to record screen, webcam, or both. Its standout feature is unlimited recording in the free plan, a rarity among screen recording tools. However, its basic editing functionalities and limited advanced features may not fulfill the needs of professionals or users requiring complex edits. Vmaker shines in educational settings and for content creators prioritizing ease of use and recording over extensive editing capabilities.
Features:
- Stylish and intuitive interface: Easy to navigate and visually appealing.
- Record screen, webcam, or both simultaneously.
- Basic editing tools: Trim, split, merge, and add annotations to recordings.
- Unlimited recording: Even in the free plan, unlike many competitors.
- Integrations with various platforms: Google Drive, YouTube, Zoom, etc.
- Cloud storage and sharing options: Securely store and share recordings online.
Pros:
- User-friendly: Simple interface makes it easy to learn and use for beginners.
- Unlimited recording: A valuable benefit for users with longer recording needs.
- Basic editing tools sufficient for casual use: Trim, annotate, and enhance recordings effectively.
- Modern and stylish interface: Visually appealing and user-friendly design.
- Integrations with popular platforms: Streamlines workflows and sharing.
Cons:
- Limited advanced features: Lacks functionalities like multi-track editing, green screen, and advanced effects.
- Simpler editing tools: Not suitable for complex editing projects or professional productions.
- Output limitations: Free plan has watermark and recording time restrictions.
- Browser extension limitation: Requires Chrome extension for full functionality.
Best for:
- Beginners and casual users seeking a straightforward screen recording tool.
- Educators and content creators needing basic recording and editing for presentations, tutorials, or short videos.
- Users who prioritize unlimited recording and ease of use over advanced features.
Personal Recommendation:
If you’re new to screen recording or simply want a user-friendly tool for basic recording and editing tasks, Vmaker is a great option. Its unlimited recording feature in the free plan is a significant advantage. However, if you require advanced editing capabilities, green screen effects, or complex post-production features, consider exploring software with more robust functionalities.
Score: 7.5/10
Overall: Vmaker stands out for its user-friendly interface and unlimited recording in the free plan. It’s a solid choice for beginners, educators, and casual users who prioritize simplicity and basic editing tools. However, its lack of advanced features and reliance on a Chrome extension for full functionality limit its appeal to professional users or those with complex editing needs.
19. Nero Platinum Suite 2025

While not solely a screen recorder, Nero Platinum Suite 2025 includes a robust module that shines for its stability and high-quality outputs, ideal for professional-grade projects. However, its hefty price tag and bundle-oriented approach might deter users who only need screen recording features. It’s most valuable for existing Nero ecosystem users who can leverage the suite’s diverse multimedia tools.
Features:
- Stable and reliable screen recording: Handles high-definition content smoothly.
- High-quality outputs: Delivers professional-grade recordings for demanding projects.
- Additional multimedia functionalities: Editing, backup, conversion, music creation, etc.
- Wide range of tools: Covers diverse multimedia needs within the Nero ecosystem.
- User-friendly interface: Streamlined design for convenient navigation.
Pros:
- Exceptional stability and output quality: Perfect for professional-grade content creation.
- Comprehensive suite: Offers one-stop solution for various multimedia tasks.
- User-friendly interface: Makes navigating the diverse features easy.
- Integration with Nero ecosystem: Seamless workflow for existing users.
Cons:
- Expensive: Higher cost compared to standalone screen recording options.
- Bundle-oriented: May not be cost-effective for users only needing screen recording.
- Limited platform compatibility: Windows and macOS only.
Best for:
- Existing Nero Platinum Suite users seeking a professional-grade screen recording module.
- Content creators and professionals requiring high-quality recordings for demanding projects.
- Users who need various multimedia functionalities besides screen recording.
Personal Recommendation:
If you already utilize Nero Platinum Suite or require professional-grade screen recording with additional multimedia tools, Nero Platinum Suite 2025 is a fantastic option. Its stability, output quality, and comprehensive features are top-notch. However, for users solely interested in screen recording, consider exploring more affordable standalone options with features tailored to your specific needs.
Score: 8/10
Overall: Nero Platinum Suite 2025’s robust screen recording module boasts exceptional stability and output quality, making it a compelling choice for professional content creators and existing Nero users. However, its high price tag and bundled approach might make it less attractive for those who don’t require its diverse multimedia functionalities and focus solely on screen recording needs. Consider your budget and intended use case before making your decision.
20. Pactto
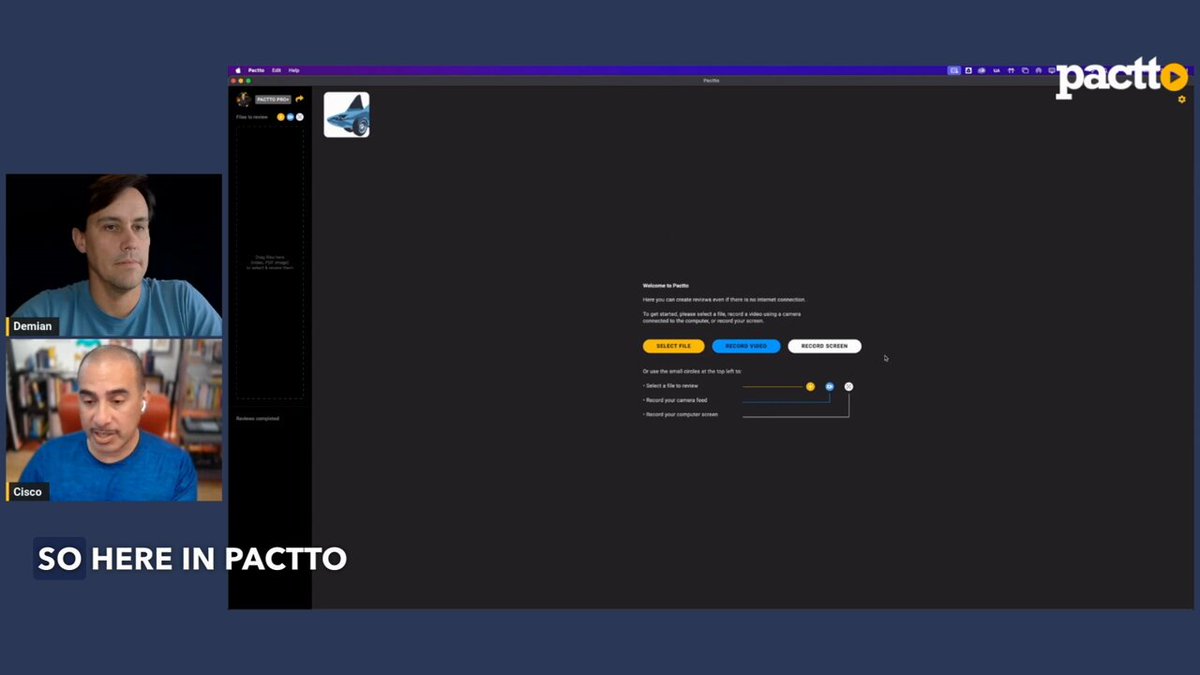
Pactto injects refreshing ideas into the screen recording scene, captivating creatives and professionals with its unique features like on-screen drawing and cloud collaboration. Its intuitive interface welcomes both beginners and veterans, while functionalities like real-time annotations and screen sketching unlock new possibilities for tutorial creation and engaging presentations. However, as a relative newcomer, its long-term reliability and performance haven’t yet weathered the test of time. Nonetheless, for early adopters and those eager to explore innovative frontiers in screen recording, Pactto offers a promising brushstroke on the digital canvas.
Features:
- Innovative recording methods: Capture screen, webcam, or both with unique drawing and annotation tools.
- Seamless cloud integration: Store, access, and share recordings securely in the cloud.
- Real-time collaboration: Annotate and edit recordings collaboratively with team members.
- Intuitive interface: User-friendly design for smooth navigation and learning.
- Versatile features: Multi-timeline editing, video review tools, and diverse export options.
Pros:
- Refreshing approach: Offers unique features not found in traditional screen recording tools.
- Ideal for creative workflows: Empowers creative expression and enhances presentations.
- Cloud-based convenience: Easy access and collaboration from anywhere.
- User-friendly and approachable: Simple learning curve for both novice and experienced users.
- Versatile toolset: Covers various screen recording and editing needs.
Cons:
- Relatively new on the market: Long-term reliability and performance still under evaluation.
- May require adaptation: New features might require adjustment for users accustomed to traditional tools.
- Pricing structure: Paid plans and potential learning curve could limit accessibility for some users.
Best for:
- Creatives and professionals seeking innovative tools for screen recording and presentations.
- Teams and individuals who value cloud collaboration and real-time feedback.
- Early adopters and pioneers eager to explore new possibilities in visual communication.
Personal Recommendation:
If you’re drawn to fresh ideas and want to explore innovative ways to record and enhance your screen captures, Pactto is definitely worth a try. Its unique features and intuitive interface offer exciting possibilities, especially for creative professions. However, keep in mind that, as a new player, its long-term stability and performance are still establishing themselves. Consider your specific needs and preferences when deciding whether Pactto’s unconventional brushstrokes can paint your digital masterpiece.
Score: 7.5/10
Overall: Pactto’s refreshing take on screen recording injects exciting possibilities into the creative domain. Its unique features, cloud-based approach, and user-friendly interface hold great promise for early adopters and those seeking innovative tools. However, its newness on the market means its long-term reliability and performance remain under observation. Weigh your need for cutting-edge features against the comfort of established solutions before diving into Pactto’s creative brushstrokes.
Latest Developments in Screen Recorders in 2026
The screen recording landscape has seen significant evolution in 2026, with major updates and new releases shaping the market. Here’s a summary of the most noteworthy developments as of July 2026:
Major Software Updates:
- OBS Studio 31.0.3: Released in March 2026, bringing enhanced stability and new features for streamers and content creators.
- Bandicam 2026: Introduced new drawing tools and blur effects, making it easier to create professional-quality content.
- EaseUS RecExperts: Enhanced Windows screen recording capabilities with improved narrator features and selective recording options.
New Market Entrants:
- ScreenSage (macOS): A new macOS-specific screen recorder offering advanced features tailored for Mac users.
- ScreenDemos & Screen Now: Browser-based recording solutions providing simple, efficient screen capture without downloads.
- Opus Clip: A new AI-powered screen recorder focusing on content creation and editing automation.
AI-powered Enhancements:
- Automated Transcription and Captioning: AI transcription has become standard, with tools like ScreenApp leading the way in accuracy and speed.
- Smart Editing Suggestions: AI-powered editing recommendations now help creators optimize their content automatically.
- Avatar Integration: Some recorders now offer AI avatars for presentations and tutorials.
Market Growth:
- $2 Billion Market Size: The screen recording software market reached an estimated $2 billion in 2026, with projected 15% annual growth through 2033.
- Cloud Integration: Deeper integration with cloud storage and collaboration platforms for seamless sharing and teamwork.
- Interactive Content: Enhanced support for embedding forms, polls, and calls-to-action directly within recordings.
Looking Ahead:
These trends showcase the evolving nature of screen recording, aiming to provide a more efficient, accessible, and user-friendly experience for creators. As technology progresses, we can anticipate even more innovative features and functionalities, further empowering users to produce compelling and impactful video content.
Choosing the Right Tool:
Ultimately, the choice of a screen recorder remains a personal one, influenced by individual needs and preferences. By understanding your specific requirements and staying abreast of the latest developments, you can make an informed decision and utilize the most suitable tool to effectively capture and share your ideas.
This updated section aims to provide a factual and neutral overview of recent advancements in screen recording, removing unnecessary embellishments and focusing on informative value. Please note that this is just a starting point, and you can incorporate your own insights, recommendations, and specific examples to further enhance the content and cater it to your audience.
Frequently Asked Questions
What is the best free screen recording software?
OBS Studio is the best free screen recording software, offering professional-grade features including unlimited recording time, multiple sources, and streaming capabilities. ScreenApp also provides excellent free recording with AI transcription features.
Which screen recorder is best for beginners?
Loom and ScreenApp are ideal for beginners due to their intuitive interfaces and simple setup process. Both offer one-click recording and easy sharing options without requiring technical expertise.
Can I record my screen without installing software?
Yes, browser-based tools like ScreenApp and Screencastify allow you to record your screen directly from your web browser without downloading any software. These tools are perfect for quick recordings and basic editing.
What’s the best screen recorder for gaming?
OBS Studio is the top choice for gaming due to its advanced features, customizable settings, and minimal performance impact. GG Recorder is also excellent for gamers who want a simpler, gaming-focused solution.
How do I choose between free and paid screen recording software?
Choose free software if you need basic recording features and don’t mind limitations like watermarks or time restrictions. Opt for paid software if you require advanced editing, unlimited recording time, priority support, or professional features.
Which screen recorder has the best video quality?
Camtasia and ScreenFlow offer the highest video quality with professional-grade output options. OBS Studio also provides excellent quality with customizable settings for resolution and frame rate.
Can screen recording software record audio?
Yes, most screen recording software can capture system audio, microphone input, or both simultaneously. Tools like OBS Studio, Camtasia, and ScreenApp all support comprehensive audio recording options.
What’s the difference between screen recording and screen capture?
Screen recording creates video files of your screen activity over time, while screen capture takes static screenshots. Screen recording software typically includes both capabilities.
Is it legal to record my screen?
Yes, recording your own screen is legal. However, be cautious when recording copyrighted content, video calls with others, or content from streaming services, as these may have legal restrictions.
How much storage space do screen recordings use?
Storage requirements vary based on recording quality, duration, and compression. A 10-minute 1080p recording typically uses 100-500MB, while 4K recordings can use 1-2GB for the same duration.
Conclusion
Choosing the best screen recording software in 2026 depends on your specific needs, budget, and technical expertise. Here’s our final recommendation based on different use cases:
For Beginners: ScreenApp offers the perfect balance of simplicity and powerful AI features, with unlimited free recording and browser-based convenience.
For Professionals: Camtasia provides the most comprehensive editing suite, while OBS Studio offers unmatched customization for streaming and advanced recording needs.
For Gamers: OBS Studio remains the top choice for its performance optimization and streaming capabilities, with GG Recorder as a simpler alternative.
For Teams: Loom excels in collaboration and quick sharing, making it ideal for remote teams and business communication.
For Budget-Conscious Users: OBS Studio and ShareX provide professional-grade features completely free, while ScreenApp offers excellent value with its AI-powered free tier.
The screen recording landscape continues to evolve with AI integration, cloud-based solutions, and enhanced collaboration features. Whether you’re creating educational content, capturing gameplay, or recording business presentations, there’s a tool perfectly suited to your needs.
Ready to start recording? Try ScreenApp for free and experience AI-powered screen recording with automatic transcription, smart editing suggestions, and unlimited recording time. No credit card required.