How to Stop & Record Screen on Mac (macOS Tahoe 2026)
On this page
Can’t find the stop button? You’re not alone. “How to stop screen recording on Mac” is one of the most searched Mac questions, and the answer is simpler than you think. This guide covers every way to stop a recording, plus a full walkthrough of Mac’s built-in recording tools and how they’ve changed with macOS Tahoe.
If you record on Mac often, skip the rituals. The free ScreenApp Mac app records any window or your full screen, captures system audio without BlackHole, and adds AI transcripts you can search by voice.
Stop Screen Recording on Mac
Quick answer: Click the Stop button in your menu bar (top-right corner) or press Command + Control + Esc. Both work instantly from any app.
Here are all four ways to stop a Mac screen recording, from fastest to most thorough.
Keyboard Shortcut (Fastest)
Press Command + Control + Esc (⌘⌃⎋). This works from any app, any screen, any recording method. The recording ends immediately and saves to your chosen location.
Menu Bar Stop Button
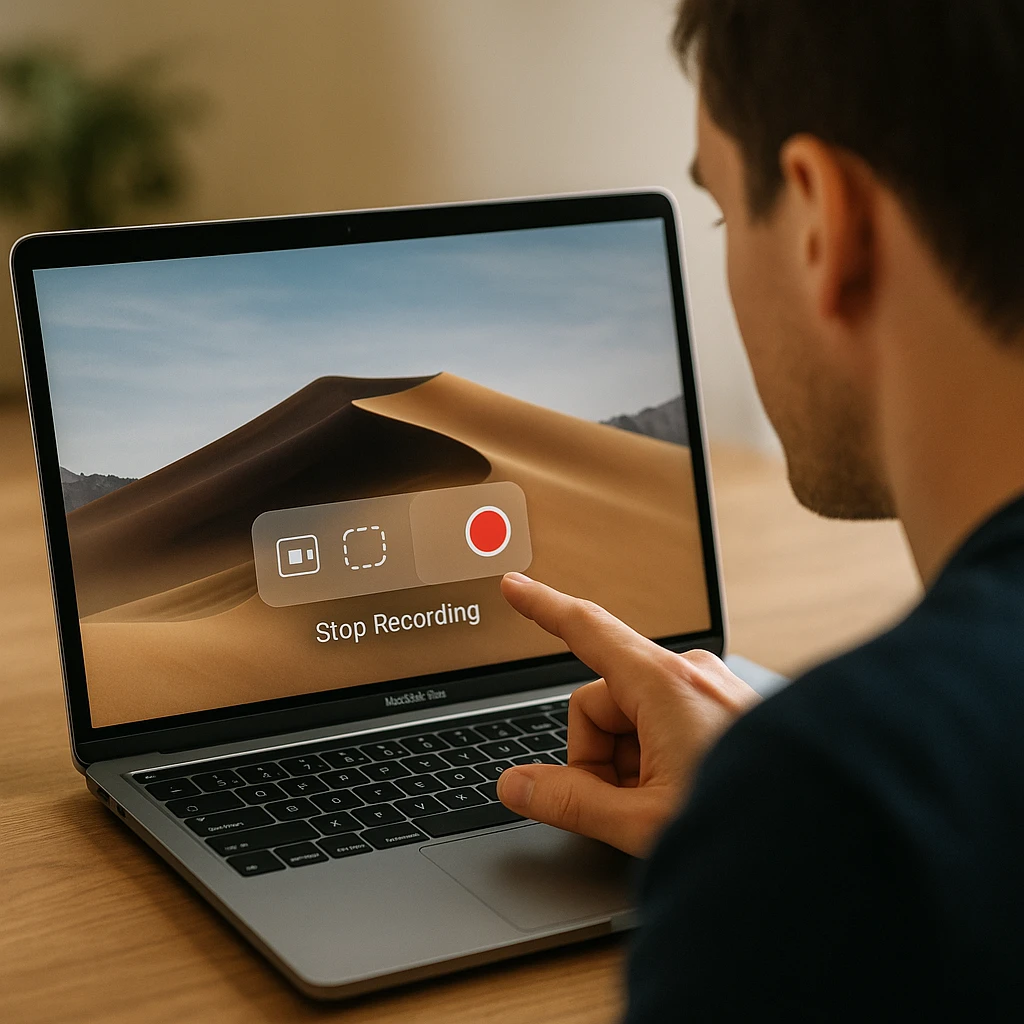
Look at the top-right of your screen for the Stop icon (a square inside a circle). Click it once. Your recording file saves automatically, usually to the Desktop.
Screenshot Toolbar Stop
Press Command + Shift + 5 to reopen the toolbar. Click the Stop Recording button that appears. The file processes and a thumbnail preview pops up in the corner of your screen.
QuickTime Player Stop
If you started recording from QuickTime, click the Stop button in the QuickTime recording window. Or just use the universal shortcut: Command + Control + Esc.

Can’t Find the Stop Button?
Check these spots:
- Menu bar (top-right corner) — look for the square-in-circle icon
- QuickTime Player window (if you started the recording there)
- Screenshot toolbar — press Command + Shift + 5 to bring it back
- Touch Bar (MacBook Pro models with Touch Bar)
If none of these work, the recording app may be frozen. Open Activity Monitor (Applications > Utilities), search for “ScreenSnapShot” or “QuickTime Player,” and force quit it. Your recording is usually saved up to that point.
Recording Won’t Stop? Fix It
Sometimes a recording gets stuck. Here’s the fix order:
- Try all shortcuts first: Command + Control + Esc, then Command + Shift + 5 and click Stop
- Force quit the app: Open Activity Monitor, find “ScreenSnapShot” or “QuickTime Player,” click the X button, choose Force Quit
- Restart your Mac: Apple menu > Restart. The partial recording file is usually still on your Desktop
- Check for frozen processes: In Activity Monitor, sort by CPU usage. A process using 90%+ CPU may be blocking the stop command
Screen Record with Command+Shift+5
This is the built-in Screenshot toolbar, available on macOS Mojave (10.14) and later. It’s the fastest way to start recording.
- Press Command + Shift + 5 (⌘⇧5)
- Choose your recording type:
- Record Entire Screen — captures everything
- Record Selected Portion — drag to select an area
- Click Options to configure:
- Save to: Desktop, Documents, Clipboard, or a custom folder
- Timer: None, 5 seconds, or 10 seconds
- Microphone: None, Built-in, or an external mic
- Show Mouse Clicks: Toggle on for tutorials
- Click Record
- To stop: Command + Control + Esc or click the Stop button in the menu bar
macOS Tahoe update: On supported Macs running macOS Tahoe (macOS 26), you can now choose between SDR (H.264) for maximum compatibility or HDR (HEVC) for richer colors and higher dynamic range. Find this under Options > Capture Format. See Apple’s screen recording guide for details.
Record with QuickTime Player
QuickTime is better for long recordings. It handles multi-hour sessions without issues and gives you basic editing tools after you finish.
- Open QuickTime Player (Applications > QuickTime Player)
- Go to File > New Screen Recording
- The Screenshot toolbar appears (same one as Command + Shift + 5)
- Click the dropdown arrow to select your microphone
- Click Record, then click the screen for full-screen or drag to select an area
- To stop: Command + Control + Esc or click Stop in the menu bar
After recording, QuickTime opens the file automatically. You can trim (Edit > Trim), split clips, and export in different formats (File > Export As).
Record System Audio on Mac
Mac blocks system audio recording by default for privacy reasons. Your microphone records fine, but sounds from apps, browsers, and games won’t appear in the recording unless you route them manually.
BlackHole (Free, Open Source)
- Download BlackHole (2ch version is enough for most people)
- Open Audio MIDI Setup (Applications > Utilities)
- Click the + button, choose Create Multi-Output Device
- Check both your speakers/headphones and BlackHole
- In your recording settings, select BlackHole as the microphone input
- System audio now routes to your recording
SoundFlower (Free)
Similar to BlackHole, but slightly older. Install it, set it as your output device in System Preferences > Sound, then select it as the input in your recording app. The downside: you won’t hear the audio through your speakers while recording unless you set up a multi-output device.
Hardware Workaround
No software needed. Play audio through external speakers and let your microphone pick it up. Quality varies, but it works for quick captures where pristine audio isn’t required.
Mac Screen Recorder Comparison
| Tool | Price | System Audio | Editing | Best For |
|---|---|---|---|---|
| ScreenApp | Free + $19/mo | Yes (browser) | AI summaries, transcription | Cloud recording + team sharing |
| Screenshot Toolbar (⌘⇧5) | Free (built-in) | No (mic only) | None | Quick captures |
| QuickTime Player | Free (built-in) | No (mic only) | Basic trim | Long recordings |
| OBS Studio | Free (open source) | Yes | None (recording only) | Streaming + advanced recording |
| ScreenFlow | $169 one-time | Yes | Full video editor | Professional tutorials |
| Movavi | $44.95/yr | Yes | Basic editor included | Beginners |
| Screen Studio | $89 one-time | Yes | Auto-zoom, motion effects | Product demos + marketing |
If you just need to record your screen and share it quickly, Mac’s built-in tools or ScreenApp’s online recorder are enough. ScreenFlow and Screen Studio are worth the investment if you create tutorials or product demos regularly. OBS is the go-to for live streaming. Our best AI screen recorders review covers more options, and the OBS vs Camtasia comparison breaks down those two popular tools in detail.
Shortcuts Quick Reference
| Shortcut | What It Does | Works In |
|---|---|---|
| ⌘⇧5 | Open Screenshot toolbar / start recording | macOS Mojave+ |
| ⌘⌃⎋ (Command+Control+Esc) | Stop any screen recording | All methods |
| ⌘⇧6 | Record Touch Bar | MacBook Pro (Touch Bar models) |
| Esc | Cancel recording setup | Screenshot toolbar |
| Space | Switch to window capture mode | Screenshot toolbar |
Optimize Recording Quality
The right settings depend on what you’re recording. Here’s what works for each use case:
Software tutorials: Record at your screen’s native resolution, 30 FPS, with microphone narration. Break long tutorials into 5-10 minute segments. This gives you sharp text and readable UI elements without huge file sizes.
Presentations and slides: 720p at 15-30 FPS is plenty. Slides don’t have fast motion, so lower frame rates look fine and produce smaller files that are easier to share. Built-in microphone quality is usually acceptable.
Gaming and fast motion: 1080p at 60 FPS minimum. Use an external microphone for commentary. Save to an external SSD if you can — the faster write speeds prevent frame drops during recording.
Meetings and calls: Use your Mac’s built-in tools or a cloud-based recorder like ScreenApp for automatic cloud storage and AI-powered meeting notes. If you need the full meeting flow, our guide on recording Zoom meetings covers the specifics.
Storage by Quality Level
| Setting | 10 Minutes | 1 Hour |
|---|---|---|
| 720p / 30 FPS | ~150 MB | ~900 MB |
| 1080p / 30 FPS | ~300 MB | ~1.8 GB |
| 1080p / 60 FPS | ~600 MB | ~3.6 GB |
| 4K / 30 FPS | ~1 GB | ~6 GB |
| 4K / 60 FPS | ~2 GB | ~12 GB |
Tip: If file sizes are getting out of hand, export a compressed copy in QuickTime (File > Export As > 1080p) or use HandBrake (free) to re-encode without visible quality loss.
macOS Tahoe Recording Updates
macOS Tahoe (macOS 26) brought a few changes to screen recording:
- HDR recording: On supported Macs, you can now record in HDR using the HEVC format. Open the Screenshot toolbar (⌘⇧5), click Options, and look for Capture Format. Choose HDR for richer colors or SDR (H.264) for maximum compatibility with older devices and players.
- Unified recording interface: QuickTime’s “New Screen Recording” and the Screenshot toolbar now launch the same system tool. There’s no functional difference between starting from either one.
- Permission improvements: macOS Sequoia (macOS 15) removed the need for weekly screen recording permission resets for trusted apps. Tahoe carries this forward. You grant permission once and it sticks.
If you’re still on macOS Sonoma or earlier, the core recording features work the same. The main thing you miss is HDR capture and the simplified permissions.
Screen recordings are often used to create tutorials, training videos, or to enhance presentations for business and education.
Record Mac Screen with Audio
Most people want both their voice and their screen in the recording. Here’s the simplest setup:
- Press Command + Shift + 5
- Click Options
- Under Microphone, select Built-in Microphone (or your external mic)
- Click Record
That’s it for voiceover. If you need system audio too (sounds from apps, games, browser), see the BlackHole or SoundFlower sections above.
For users primarily focused on audio content, our guide to top online voice recorders covers browser-based alternatives. And if you’re troubleshooting mic issues, our article on voice dictation not working on iPhone addresses common audio input problems that apply to Mac too.
These resources are especially useful for anyone developing applications for Apple devices, where audio functionality and input reliability are critical considerations.
Privacy and Permissions
macOS requires explicit permission for apps to record your screen. Here’s what to know:
- Built-in tools (Screenshot toolbar, QuickTime) always have permission. No setup needed.
- Third-party apps need permission granted in System Settings > Privacy & Security > Screen Recording. You’ll see a prompt the first time you use them.
- Recording calls: Let participants know you’re recording. Many regions require consent from all parties.
- Copyrighted content: Recording streaming services may violate their terms of service. Some services (Netflix, Disney+) actively block screen recording and show a black screen instead.
FAQ
How do I stop screen recording on Mac?
Press Command + Control + Esc or click the Stop button in the menu bar (top-right corner, looks like a square inside a circle). Both methods work instantly regardless of which app you used to start the recording.
How do I end a screen recording on Mac that won’t stop?
Open Activity Monitor (Applications > Utilities), search for “ScreenSnapShot” or “QuickTime Player,” select the process, and click the X button to force quit. Your recording file is usually preserved up to the moment you force-quit.
Where do Mac screen recordings save?
By default, recordings save to your Desktop. You can change this before recording: press Command + Shift + 5, click Options, and choose a different location under “Save to.” Options include Desktop, Documents, Clipboard, Mail, Messages, or any custom folder.
Can I record my Mac screen in 4K?
Yes. Any Mac with a Retina display records at its native resolution, which is typically higher than 4K. Just be aware that 4K recordings use about 1 GB per 10 minutes of footage. Check your available storage before starting long recordings.
Why is my Mac screen recording choppy?
Common causes: less than 20% free disk space, too many apps open (especially Chrome with many tabs), or recording at a resolution your Mac can’t handle smoothly. Close unnecessary apps, free up storage, and try recording at 1080p/30 FPS instead of higher settings.
How do I record a specific window on Mac?
Press Command + Shift + 5, then hover over the window you want to record. The window will be highlighted. Click to select it and start recording just that window. This is cleaner than full-screen recording for app demos.
Does Mac screen recording capture audio?
It captures microphone audio if you enable it in Options before recording. It does not capture system audio (sounds from apps, games, videos) by default. To get system audio, install BlackHole or SoundFlower and set up audio routing as described above.
Can I record my screen on macOS Tahoe?
Yes. macOS Tahoe (macOS 26) uses the same Command + Shift + 5 toolbar and QuickTime Player methods. It adds HDR recording in HEVC format on supported hardware and a cleaner permission system for third-party recording apps.
What’s the maximum recording length on Mac?
There is no time limit built into macOS. Recording length is limited only by available storage. QuickTime handles multi-hour sessions reliably. Plan for roughly 1 GB per 10 minutes at 1080p, or 6 GB per hour at 4K.
Last updated February 2026. Tested on macOS Sonoma 14, macOS Sequoia 15, and macOS Tahoe 26 across MacBook Air M2/M3, MacBook Pro M3/M4, iMac M3, and Mac Studio M2 Ultra.
FAQ
How do I stop screen recording on Mac?
Press Command + Control + Esc or click the Stop button in the menu bar (top-right corner, looks like a square inside a circle). Both methods work instantly regardless of which app you used to start the recording.
How do I end a screen recording on Mac that won't stop?
Open Activity Monitor (Applications > Utilities), search for "ScreenSnapShot" or "QuickTime Player," select the process, and click the X button to force quit. Your recording file is usually preserved up to the moment you force-quit.
Where do Mac screen recordings save?
By default, recordings save to your Desktop. You can change this before recording: press Command + Shift + 5, click Options, and choose a different location under "Save to." Options include Desktop, Documents, Clipboard, Mail, Messages, or any custom folder.
Can I record my Mac screen in 4K?
Yes. Any Mac with a Retina display records at its native resolution, which is typically higher than 4K. Just be aware that 4K recordings use about 1 GB per 10 minutes of footage. Check your available storage before starting long recordings.
Why is my Mac screen recording choppy?
Common causes: less than 20% free disk space, too many apps open (especially Chrome with many tabs), or recording at a resolution your Mac can't handle smoothly. Close unnecessary apps, free up storage, and try recording at 1080p/30 FPS instead of higher settings.
How do I record a specific window on Mac?
Press Command + Shift + 5, then hover over the window you want to record. The window will be highlighted. Click to select it and start recording just that window. This is cleaner than full-screen recording for app demos.
Does Mac screen recording capture audio?
It captures microphone audio if you enable it in Options before recording. It does not capture system audio (sounds from apps, games, videos) by default. To get system audio, install BlackHole or SoundFlower and set up audio routing as described above.
Can I record my screen on macOS Tahoe?
Yes. macOS Tahoe (macOS 26) uses the same Command + Shift + 5 toolbar and QuickTime Player methods. It adds HDR recording in HEVC format on supported hardware and a cleaner permission system for third-party recording apps.
What's the maximum recording length on Mac?
There is no time limit built into macOS. Recording length is limited only by available storage. QuickTime handles multi-hour sessions reliably. Plan for roughly 1 GB per 10 minutes at 1080p, or 6 GB per hour at 4K. --- Last updated February 2026. Tested on macOS Sonoma 14, macOS Sequoia 15, and macOS Tahoe 26 across MacBook Air M2/M3, MacBook Pro M3/M4, iMac M3, and Mac Studio M2 Ultra.